

Collaborate with teamspaces
Introduction
Oodrive Work allows you to create collaborative spaces with multiple owners, known as team teamspaces. Teamspaces enable you to organize collaborative work around common goals and facilitate the distribution of documents to internal and external collaborators.
Each teamspace has its own storage and trash. Its members can intervene on the files it contains according to the permissions granted by their role.
Teamspace types
There are two types of teamspaces:
Public teamspaces
A public teamspace can be viewed by all the Users authenticated to the service. The Owners of the public teamspace upload documents and other content for wide circulation.
A public teamspace can be Open to everyone or only accessible On request, after validation by an Owner.
Private teamspaces
A private teamspace is a collaboration space whose existence is known only to its owners and the colleagues they have invited.
Member permissions
Each member of a teamspace is assigned a role that defines their scope of action in the teamspace. These roles are as follows: Owner, Contributor, Guest and Custom.
The table below details the permissions associated with each role:
|
Permissions according to member role |
||||
|---|---|---|---|---|
| Guest | Contributor | Owner | Custom* | |
|
COLLABORATION ON FILES |
||||
|
View a document |
• | • | • | custom permissions set by the Owner |
|
Download a document |
• | • | • | |
|
Upload a document |
• | • | ||
|
Edit a document locally |
• | • | ||
|
Edit a document online |
• | • | ||
|
Delete a document |
• | • | ||
|
SHARING |
||||
|
Secure shares via link or email |
• | • | custom permissions set by the Owner |
|
|
Manage shares |
• | • | ||
|
STORAGE MANAGEMENT |
||||
|
Modify allocated storage |
• | |||
|
Restore from trash |
• | • | ||
|
Delete from trash |
• | |||
|
ACCESS MANAGEMENT |
||||
|
Add a member |
• | |||
|
Delete a member |
• | |||
|
Manage member roles |
• | |||
|
Manage joining requests |
• | |||
*The Owner can set custom permissions to folders and subfolders, allowing or restricting specific actions for a specific user.
Please note that some of these actions can only be carried out from the web version of Oodrive Work.
Browse teamspaces
Search for a space
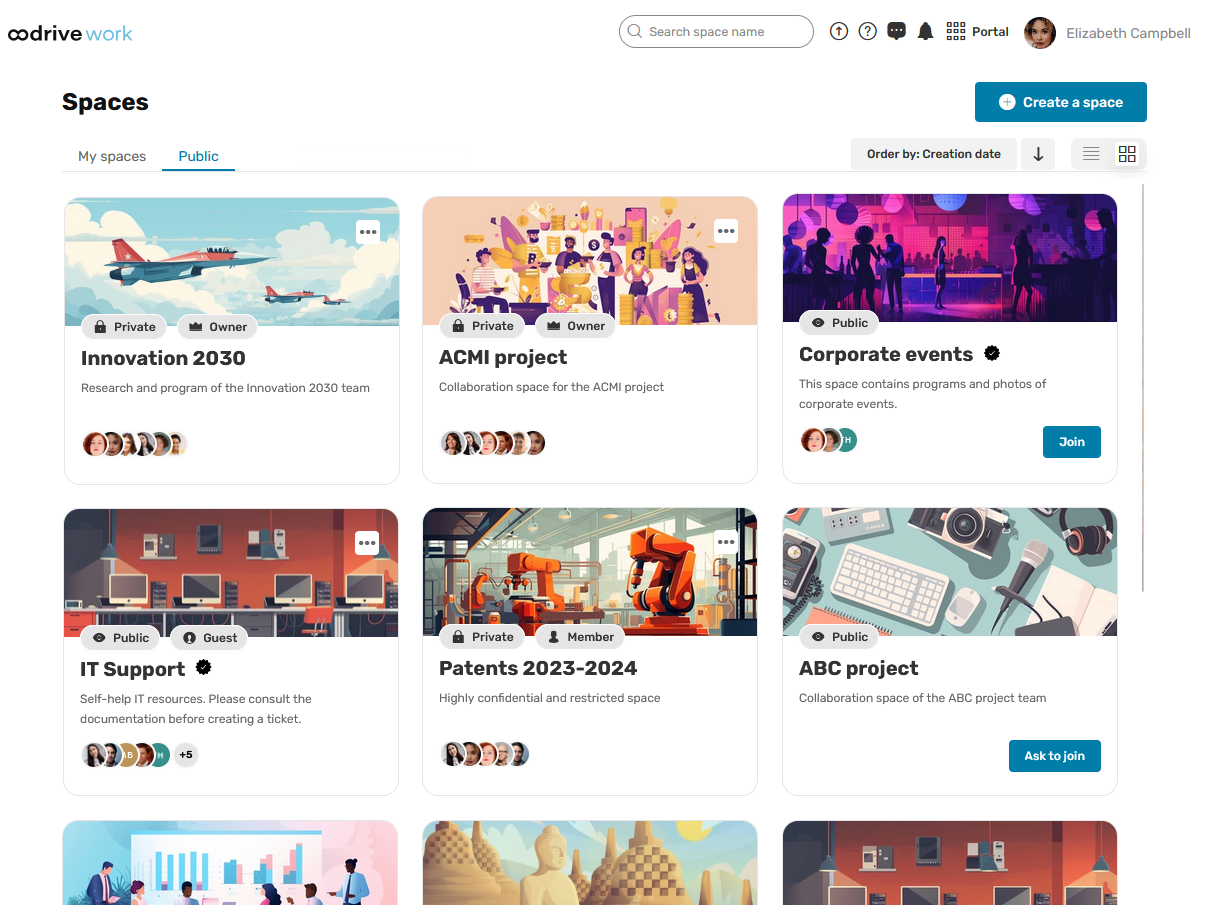
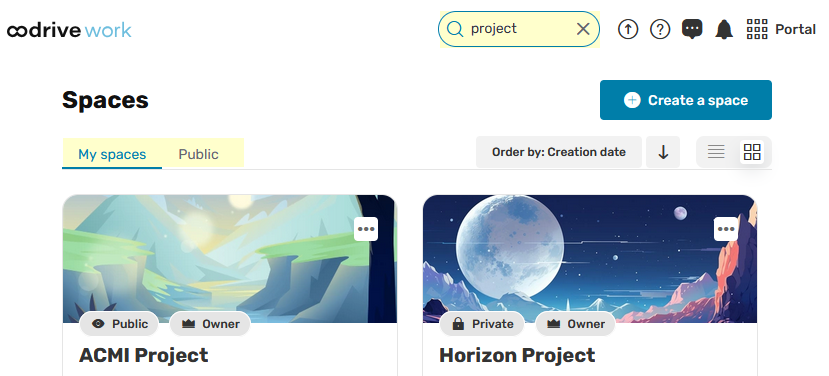
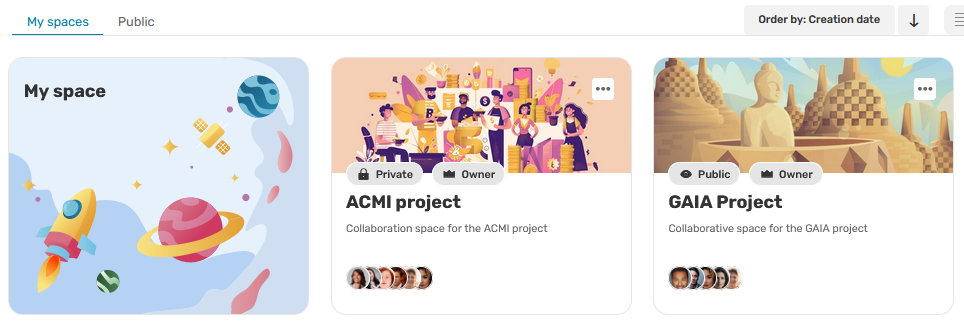
From the home page of your Oodrive Work application, you can view all available teamspaces.
-
Search for a teamspace using the search bar or filter the teamspace list using the tabs along the top of the
-
My spaces: includes
-
Public: displays all public teamspaces.
You can also sort the list of spaces by the criteria of your choice, using the
Favorites
Number of members
Creation date
Alphabetical order
-
-
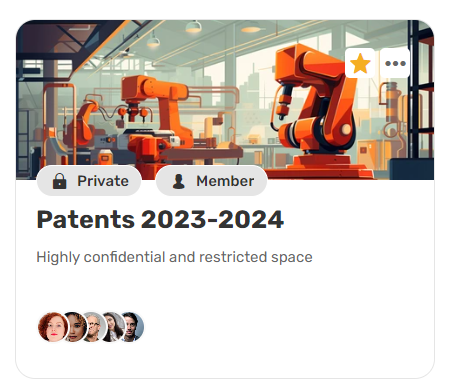
View the tile of a teamspace to see
Owner: you have full rights to manage and contribute to a teamspace.
Contributor: you can upload to the teamspace and edit, share or download the items it contains.
Guest: you will only have consultation rights on items in the teamspace.
Custom: You will have custom access permissions for each folder, set by the Owner.
For more information on roles, consult this summary table. For custom roles, please refer to the Customize member access permissions section.
-
To access a teamspace,
To leave a teamspace and return to the home page, go to the side menu on the left and click on Back.
Choose how your spaces are displayed
You can change the presentation of your spaces according to your viewing preferences.
To do so, click the icon List with lines ![]() or List with tiles
or List with tiles ![]() .
.
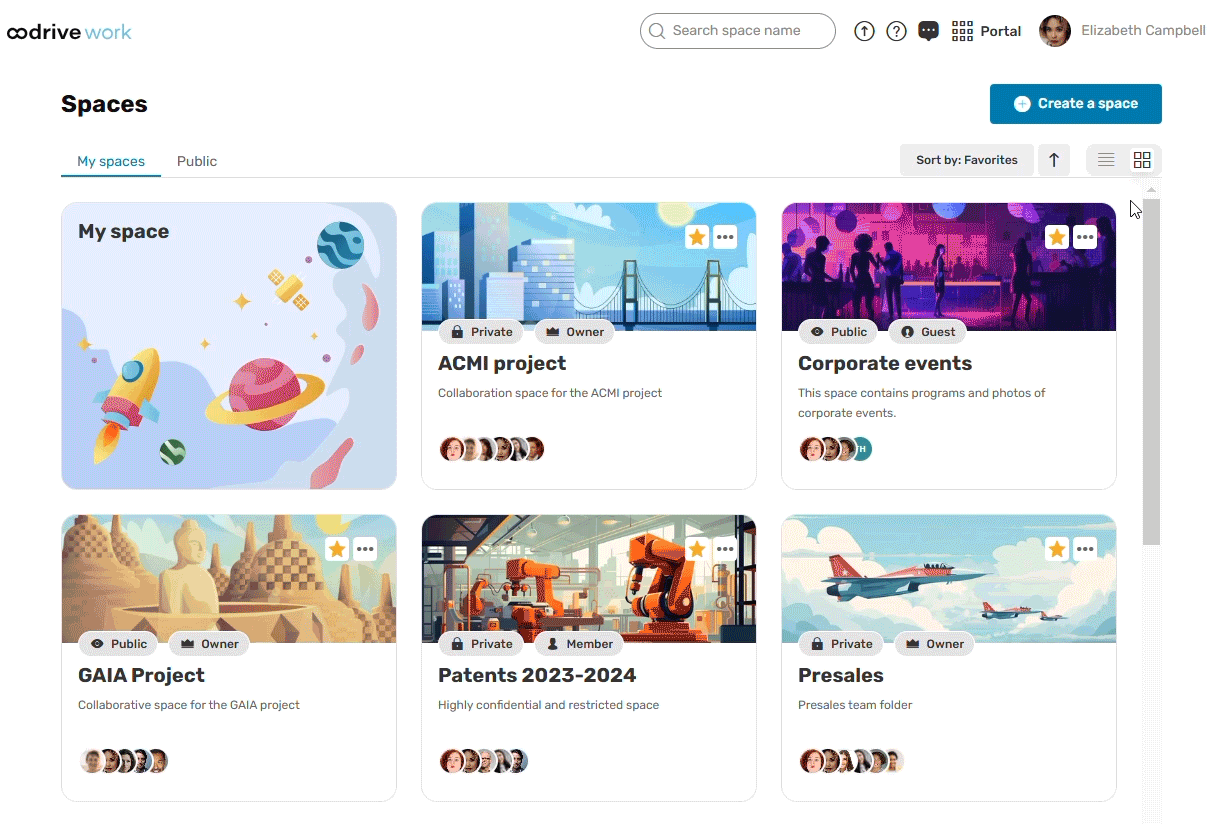
Add a teamspace to your favorites
You can add teamspaces to your favorites for quick access. Favorite teamspaces display a star on their tile.
-
From the home page of your Oodrive Work application, you can view all available teamspaces.
-
Use the search bar, filters or, sorting function to find the Teamspace you want to add to your favorites.
-
Hover over the teamspace tile and select the star to add it to your favorites.
You can remove a teamspace from your favorites at any time by deselecting the star.
Please note
If you leave a teamspace saved as a favorite, it will automatically be removed from your favorites list.
Create and manage teamspaces
Depending on the configuration made by your administrator, you may be able to create and manage new teamspaces. If you are appointed as Owner of a teamspace, you will also be able to undertake management activities.
Create a teamspace
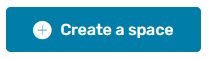
-
From the home page of your Oodrive Work application, click Create a space.
-
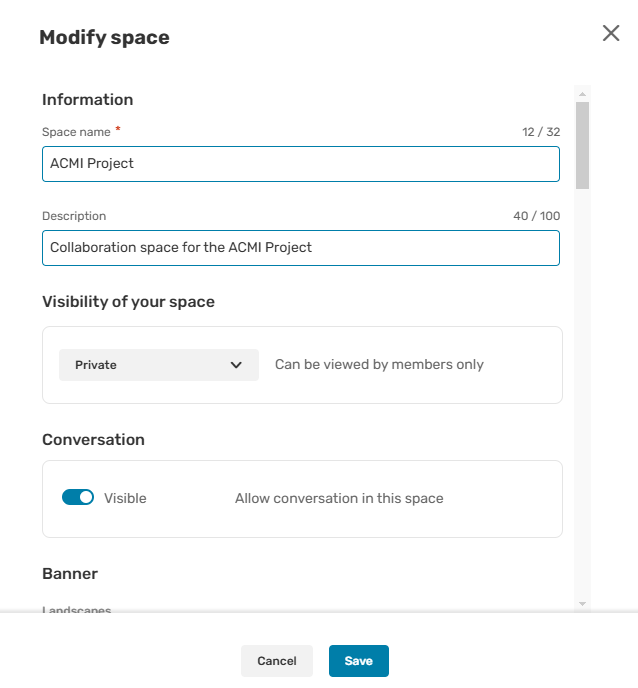
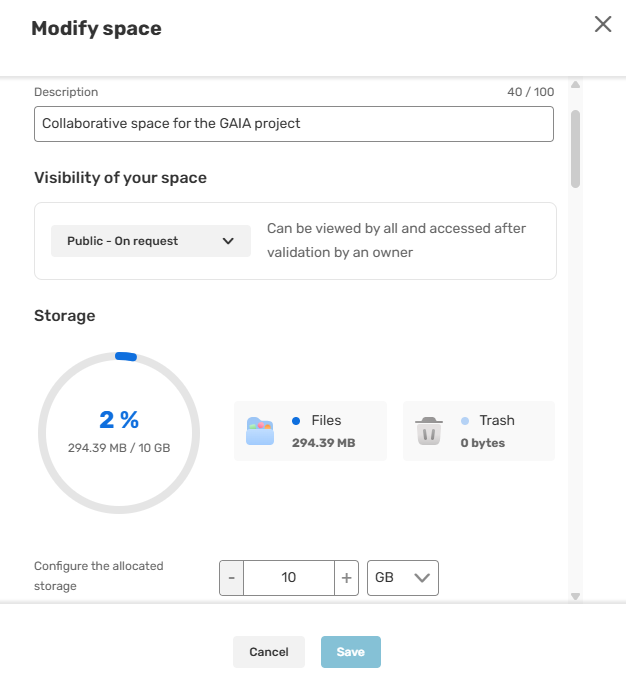
Enter a name and a description for your teamspace, then select its visibility
As a reminder, the visibility options are as follows:
-
Public - Open to everyone : teamspace freely accessible to Oodrive Work users, enabling content to be centralized and shared widely.
-
Public - On request : teamspace whose access is subject to the Owners' approval. You must invite your colleagues or validate their access requests.
-
Private : teamspace whose existence is known only to its owners and the colleagues they have invited.
If needed, you can change the visibility status of your space at a later date.
-
-
Click Create space.
Your new teamspace has been created. You can find it in the list of your teamspaces:
Activate/deactivate the team discussion
As the Owner of a teamspace, you can activate or deactivate the team discussion in your teamspace.
When activated, the team discussion is open to all teamspace members, regardless of their role. New members also have access to the conversation history.
-
From the home page of your Oodrive Work application, click on the teamspace for which you want to activate or deactivate discussion.
-
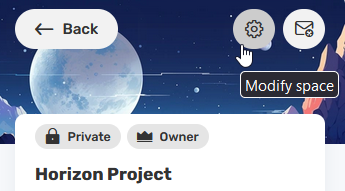
In the menu on the left, go to the teamspace tile and click on the icon Modify space
 .
. -
To activate or deactivate the Discussion feature, click on the Visible toggle switch.
-
Click Save.
You can return to this section at any time to deactivate or reactivate the team discussion.
Please note
If you deactivate the Discussion feature and reactivate it at a later date, the message history will still be available.
Modify the storage allocated to a teamspace
As the Owner of a teamspace, you can adjust the storage volume allocated to your teamspace, within the limits set by your administrator.
-
From the home page of your Oodrive Work application, click on the teamspace for which you want to manage storage.
-
In the menu on the left, go to the teamspace tile and click on the icon Modify space
. -
In the Configure the allocated storage field, enter a value, then click on the drop-down menu to select the size unit:
-
Megabyte (MB)
-
Gigabyte (GB)
-
Terabyte (TB)
-
-
Click Save.
You can return to this section at any time to modify your teamspace storage according to your needs.
Modify a teamspace
You can modify and reconfigure
-
From the home page of your Work application, click the teamspace you want to modify.
-
In the menu on the left, go to the teamspace tile and click on the icon Modify space
.
-
Rename the teamspace and/or modify its description.
-
Change the way users can join your space by selecting a new visibility status: Public - Open to everyone, Public - On request, Private.
-
Enable Discussion by activating the Visible toggle switch.
-
Modify the storage allocated to your teamspace by entering a value and selecting the size unit:
-
Megabyte (MB)
-
Gigabyte (GB)
-
Terabyte (TB)
-
-
If you want to change the teamspace illustration, select an image in the list of available options.
-
When you have finished, click Save.
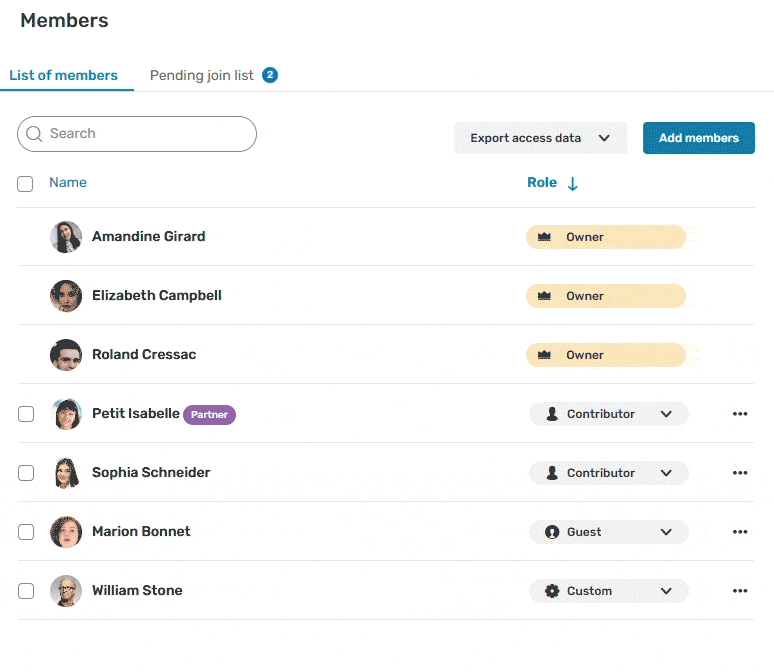
Manage teamspace members
Add members and define their permissions
-
From the home page of your Oodrive Work application, click on the teamspace for which you want to manage members.
-
In the navigation panel, click Members.
-
Click on Add members.
-
Using the address book, select the internal and external collaborators you want to add to your teamspace.
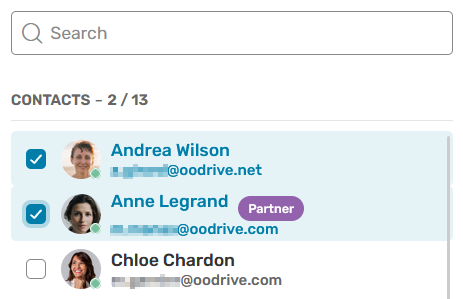
-
In the list of teamspace members, select the role you want to assign to each individual.

-
An Owner has full rights to manage and contribute to the teamspace.
-
A Contributor can upload to the teamspace and edit, share or download the items it contains.
-
A Guest can only view and download.
-
A Custom role has custom access permissions for each folder, set by the Owner.
For more information on roles, consult this summary table. For custom roles, please refer to the Customize member access permissions section.
Please note
Collaborators known as Partners (account without a license) may not become Owners.
-
-
When you have finished, click Invite.
Approve or reject joining requests
If you are the Owner of a public teamspace with on-request access, you will need to approve or reject joining requests made by your colleagues.
-
From the home page of your Oodrive Work application, click on the teamspace for which you want to manage members.
-
In the navigation panel, click Members.
-
Go to the Pending join list tab and do either of the following:
-
To reject a joining request, click Reject.
-
To approve the joining request of a colleague, click Accept and select the role you want to assign to them.
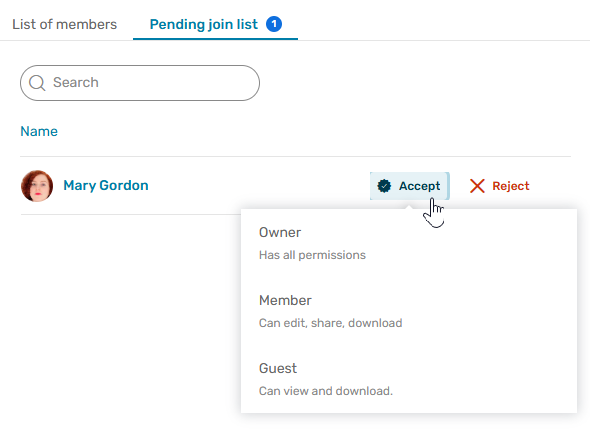
You can use the search bar along the top of the tab to find a specific access request.
-
Modify members role
-
From the home page of your Oodrive Work application, click on the teamspace for which you want to manage members.
-
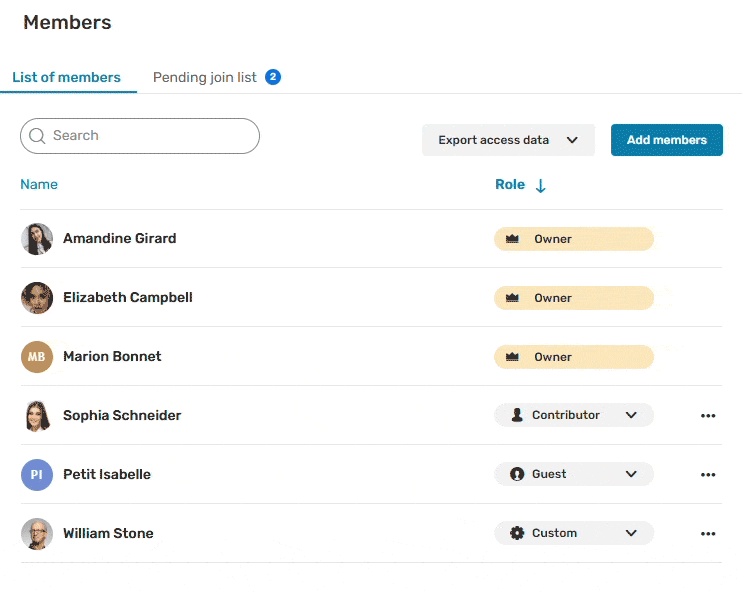
In the navigation panel, click Members then the List of members tab.
-
Browse the list of teamspace members and select the member whose role you wish to change.
You can also search for a specific member using the search bar, or sort the list of members by Name, Email, or Role by clicking on the column headings.
-
Select the new role you wish to assign to the collaborator.
-
An Owner have full rights to manage and contribute to the teamspace.
-
A Contributor can upload to the teamspace and edit, share or download the items it contains.
-
A Guest can only view and download.
-
A Custom role has custom access permissions for each folder, set by the Owner.
For more information on roles, consult this summary table. For custom roles, please refer to the Customize member access permissions section.
Please note
-
Collaborators known as Partners (account without a license) may not become Owners.
-
You cannot modify the role of an Owner nor remove them from the teamspace.
-
Tip
You can modify the role of several members at once. To do so, select these members, then click Change roles and select a role. The selected role will be applied to all members.
Customize member access permissions
As a teamspace Owner, you can create Custom roles to manage your collaborators' access permissions more precisely. This allows you to assign specific permissions to each folder or subfolder.
You can create a Custom role at different stages of a member's lifecycle in the teamspace:
-
When adding a member
-
When approving a request to add a member
-
When modifying the role of an existing member
Regardless of the path, the Custom role configuration window is the same.
Set access permissions for a Custom role
-
From the drop-down menu, select the Custom role.
-
The file manager of your teamspace is displayed.
Only the folders and subfolders within the teamspace are visible. Files located at the root of the teamspace are not displayed in this window.
-
Select the folder(s) and subfolder(s) the member should have access to.
-
For each selected folder, assign the appropriate access permission according to your needs.
As a reminder, the available access permissions are as follows:
Access permissions
Available actions for the Custom role
View
view only.
Download
view and download.
Edit
view, download, upload and edit.
Organize
view, download, upload, edit and delete.
Collaborate
view, download, upload, edit, delete and share.
Please note
-
By default, the View permission is applied to selected items.
-
By default, the permissions selected for a parent folder apply to all its subfolders. However, you may choose to define specific permissions for each subfolder manually.
-
You may also select the root of the teamspace and apply its permissions to the entire file structure. In this case, the custom member will be able to access all folders and files in the teamspace, including those that will be added in the future. A collaborator needs access to the root of the teamspace to synchronize folders via WebSynchro.
-
-
Folders that are not selected will not be visible to members with the Custom role. Hidden folders are marked with a crossed-out eye icon.
Apply one member's custom profile to another
As Owner, you can apply one member's custom permissions to another member of the same teamspace. This make it easier to manage access permissions and prevent errors.
-
From the teamspace navigation panel, click Members, then go to the List of members tab.
-
Browse the list of teamspace members and select the member to whom you would like to apply custom permissions.
-
From the drop-down menu, select the Custom role.
Your teamspace folder structure is then displayed.
-
Click Apply the role of… to display the list of members with custom permissions.
-
Select the member whose access permissions you want to copy.
Their configuration is imported and you can adjust it as needed.
-
Click Apply to save the configuration.
View for a member with a Custom role
A member with a Custom role has a tailored view of teamspace content, based on the access permissions granted to them.
Restricted access
-
A member with a custom role can manage shares they have sent themselves from the teamspace. They can also track activities for documents they have access to by subscribing to the activity summary.
However, they do not have access to the trash. This ensures that they cannot view nor permanently delete content for which they do not have the necessary permissions.
-
If an item is shared in a team discussion but the Custom role member cannot access it, it means they do not have the required access permissions to view that content.
-
A member with a Custom role who uses WebSynchro can only synchronize the folders for which they have sufficient permissions.
For further information on WebSynchro, please consult User Guide WebSynchro.
Information displayed
-
An information banner is displayed in the member’s space, indicating that the teamspace Owner has restricted their access to content.
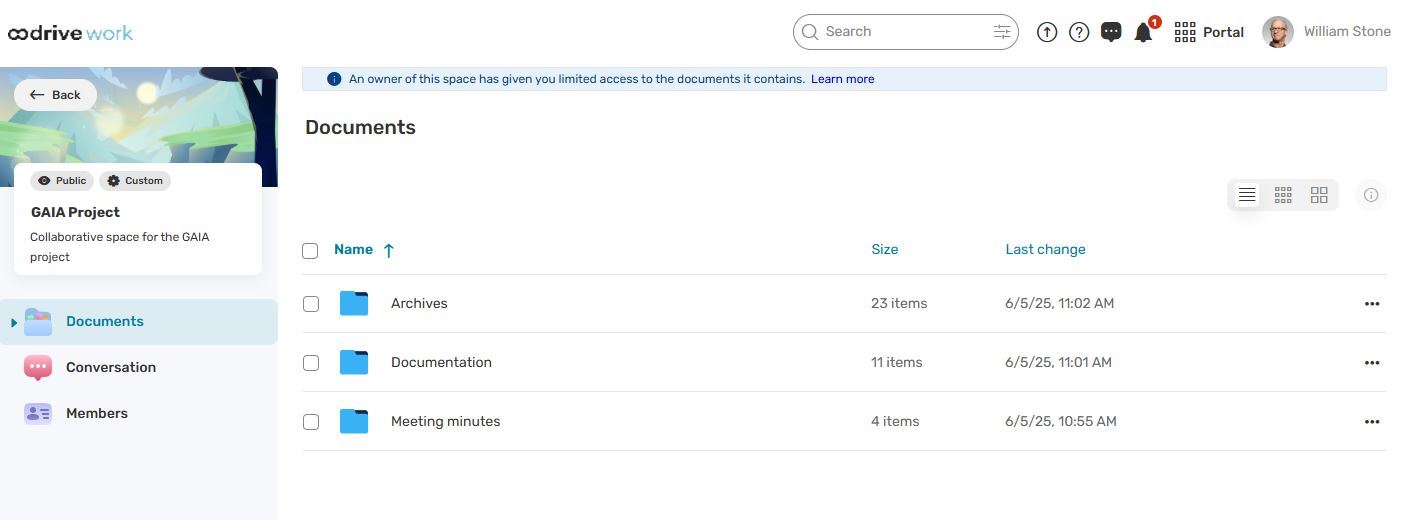
The member must contact the Owner if they wish to request additional access.
Folders organization
-
If a subfolder is made available on its own, without its parent folders, then the member with custom permissions will see it displayed at the root of the teamspace. Otherwise, the overall folder structure is respected.
Creating and importing files and folders
-
A member with a Custom role can create or import items at the root of the space or in folders for which they have the necessary permissions.
Export member access permissions
As the teamspace Owner, you can export the access permissions of your teamspace members as an XLSX or CSV file. This provides a clear overview of who can view, edit, or manage content.
This file helps you better manage member access permissions, avoid mistakes (such as unintentionally granting overly broad access), and maintain control over the shared information.
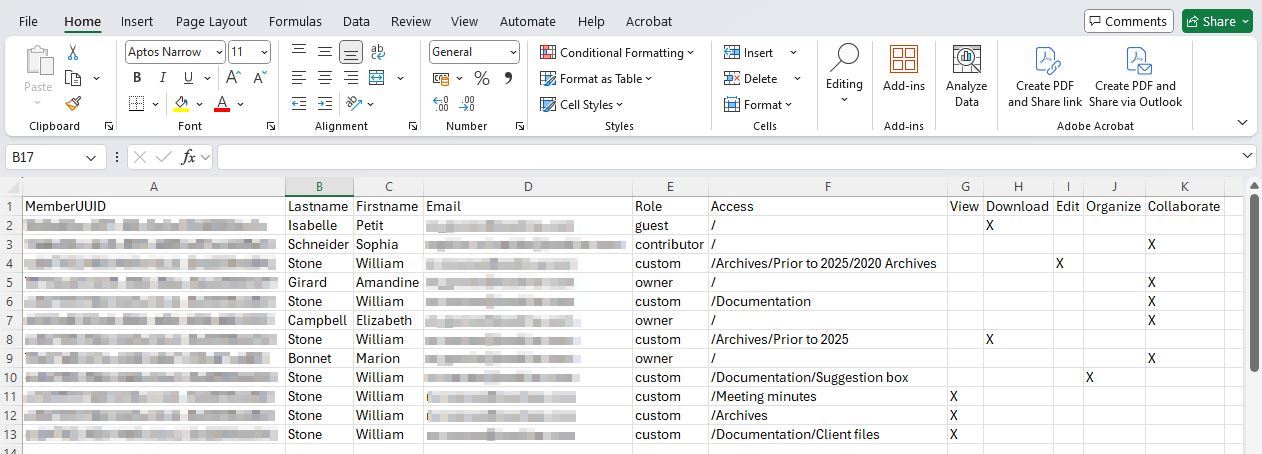
Below is a description of the columns included in the access permissions file:
|
Column title |
Description |
|---|---|
|
MemberUUID |
Member's unique identifier |
|
Lastname |
Member's last name |
|
Firstname |
Member's first name |
|
|
Member's email address |
|
Role |
Member's role within the teamspace |
|
Access |
Path to a folder in the teamspace the member has access to:
|
|
view |
The member can only view the folder contents if the box is selected. |
|
download |
The member can view and download the folder contents if the box is selected. |
|
edit |
The member can view, download, upload, and edit the folder contents if the box is selected. |
|
organize |
The member can view, download, upload, edit, and delete the folder contents if the box is selected. |
|
collaborate |
The member can view, download, upload, edit, delete, and share the folder contents if the box is selected. |
Please note
A member with a Custom role may appear multiple times in the access permissions table: one row is displayed for each folder they have access to, along with the specific access permission granted for that folder.
-
From the home page of your Oodrive Work application, click on the teamspace for which you want to manage members.
-
In the navigation panel, click Members.
-
Click Export access data and select a file format to download (XLSX or CSV).

The download will start automatically in your browser.
-
Once the download is complete, open the file and save it to your computer.
Delete members
-
From the home page of your Oodrive Work application, click on the teamspace for which you want to manage members.
-
In the navigation panel, click Members then the List of members tab.
-
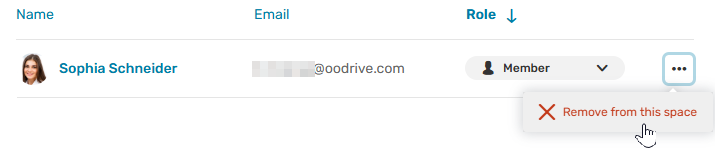
Browse the list of teamspace members and select the member you wish to remove from the space.
You can also search for a specific member using the search bar, or sort the list of members by Name, Email, or Role by clicking on the column headings.
-
Click on the three dots next to the collaborator’s name you want to delete, then click Remove from this space.
Please note
You cannot change an Owner's role or remove them from the space. If you wish an Owner to leave the space, they must do so themselves. You can also request it from your administrator.
Tip
You can remove multiple members at once. To do so, select several members and click Remove from this space. All selected members will be removed from your teamspace.
Deactivate or delete a teamspace
Only an Administrator can deactivate or delete a teamspace.
For reasons of security and data confidentiality, an Administrator cannot view the name or content of teamspaces created on Oodrive Work.
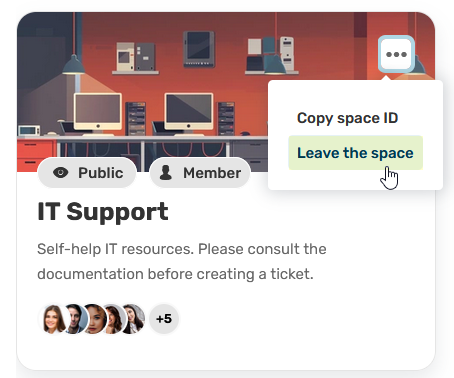
Therefore, if you wish to deactivate or delete a teamspace you own, you will need to provide the Administrator with your teamspace's unique identifier.
To retrieve your teamspace's unique identifier :
-
Go to the home page of your Oodrive Work application.
-
Click on the three small dots on the tile of the teamspace you want to archive or delete.
-
Click Copy space ID.
-
Provide the ID to your Administrator so that they may deactivate or delete the teamspace.
Join a teamspace
Depending on the configuration made by your administrator, you may view and join teamspaces you are not yet a member of.
Join a teamspace that is open to everyone
Some public teamspaces can be accessed freely.
-
From the home page of your Oodrive Work application, click Public to display all public teamspaces.
-
Identify the teamspace you want to join and click Ask to join.
You automatically join the teamspace with the Guest role. If necessary, a teamspace Owner can attribute another role to you.
Join a teamspace on request
Some public teamspaces are accessible only with the permission of the Owners. You must make a request to join them.
-
From the home page of your Oodrive Work application, click Public to display all public teamspaces.
-
Identify the teamspace you want to join and click Ask to join.
You must now wait for an Owner to accept your request. Once your request has been approved, you will be able to access the teamspace with the permissions defined for you by the Owner.
Join a private teamspace
The existence of a private teamspace is known only to its Owners and the individuals they have invited. You can only join a private teamspace if one of the Owners has chosen to invite you.
Participate in the team discussion
Please note
The discussion and videoconferencing features are currently not available in a SecNumCloud-qualified Private Cloud environment.
Oodrive Work allows you to communicate with your team members through the discussion and videoconferencing features. These tools make everyday collaboration easier by allowing you to send real-time messages or start a video call from the application.
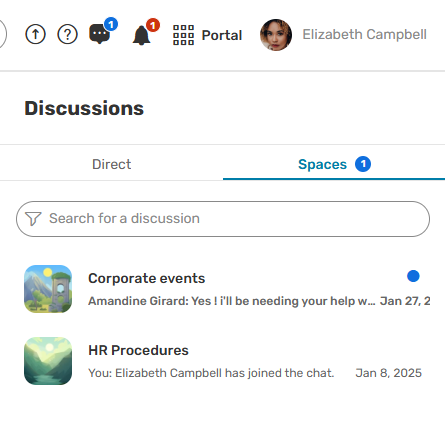
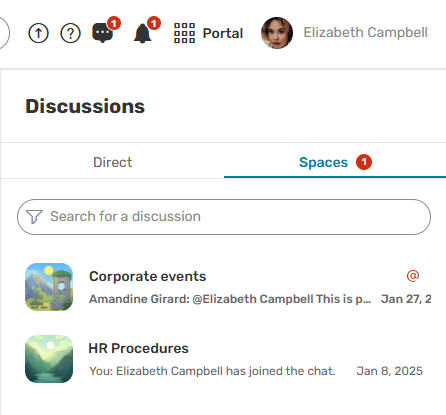
Access a team discussion
You can access a team discussion:
-
From a teamspace, by clicking the Discussion menu.

-
From the home page, by clicking the Discussions icon
 , then the Spaces tab.
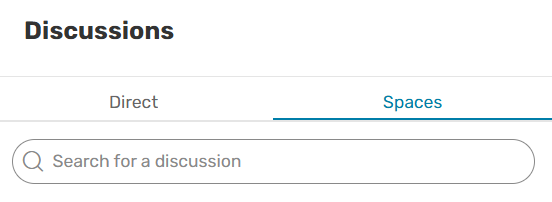
If you want to find a specific discussion, enter the teamspace name in the search bar.
Discussion notifications
If you have authorized your browser to send you notifications from Oodrive, you will be notified when you receive a new message or when a videoconference has started. If you have not, you can authorize them later in your browser's notification settings.
To enable browser notifications:
|
Browser |
Procedure |
|---|---|
|
Chrome |
Go to: Customize and control Google Chrome > Settings > Privacy and security > Site settings. Under Permissions, click Notifications and go to the Customized behaviour section. Next to Allowed to send notifications, click Add, then enter "https://sharing.oodrive.com" and click Add again. |
|
Edge |
Go to: Settings and more > Settings > Privacy, search, and services > Site permissions > All permissions > Notifications. Under Customized behaviors > Allowed to send notifications click Add site, enter "https://sharing.oodrive.com" and click Add. |
|
Firefox |
Click the menu button Click Notifications and find the line “https://sharing.oodrive.com”, then select Allow from the dropdown menu. |
A blue dot also appears on the Chat icon![]() to let you know you have unread messages. When you have been tagged in a conversation, the dot becomes red
to let you know you have unread messages. When you have been tagged in a conversation, the dot becomes red ![]() and an @ symbol appears on the conversation tile:
and an @ symbol appears on the conversation tile:
|
|
|
|
New message |
New message you're tagged in |
Please note
An email notification is sent every day at 6 p.m. to inform you of any unread messages.
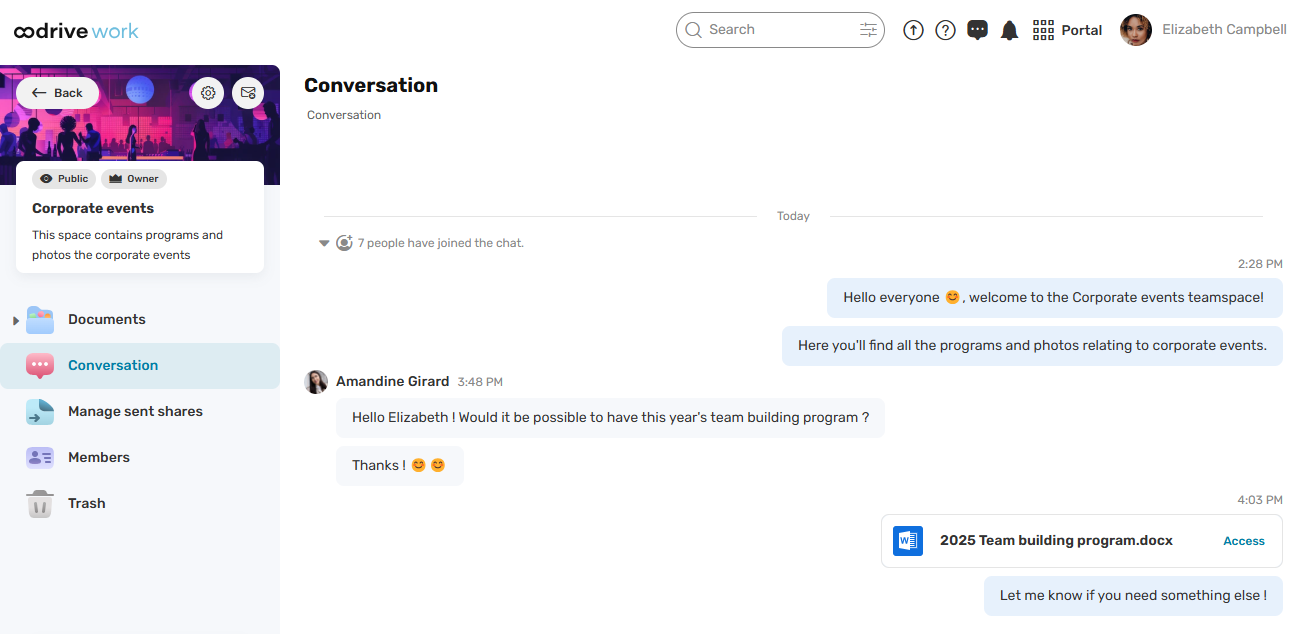
Chat in a teamspace
When enabled for a teamspace, the Discussion feature allows you to chat with all teamspace members. Over the course of your discussions, you may:
-
Insert emoticons in your messages
-
Delete a message
-
Tag other members
-
Reply to a specific message
-
React to a message
-
Edit a message
-
Share documents in the team discussion
Send a message
-
From the home page of your Oodrive Work application, click the teamspace in which you want to chat.
-
In the navigation panel, click Discussion.
-
Enter your message.
Insert emoticons: click the
 icon and select the emoticon of your choice.
Paste an image from the clipboard: copy an image of your choice and paste it into the text field. Your image must be less than 5MB in size and in PNG, JPEG, GIF, or WEBP format.
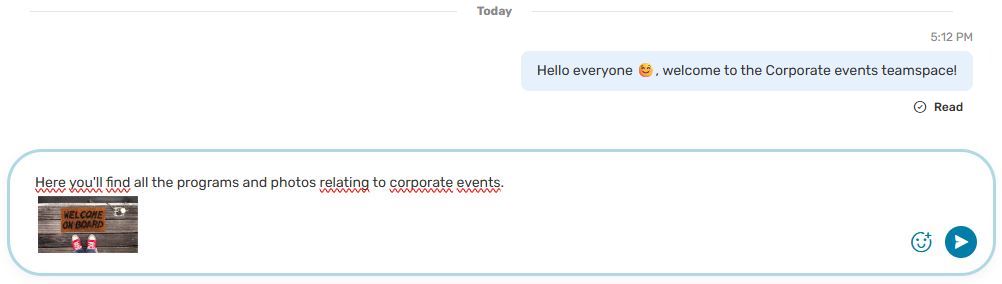
Tag a colleague: enter @ and select a colleague in the list. You can also tag all members by selecting @Everyone.
-
When your message is ready, click
 or press the Enter key.
Tip
The status displayed below your messages allows you to track their state: Sending, Sent, Failed to send, or Read. If a message failed to send, click Retry to send the message.
Hover over the Read status to see the number and names of participants who have viewed the message.
Edit a message
You can edit a message you have already sent.
-
Hover over the message and click the Edit icon
 .
. -
Edit your message, then confirm by clicking the Edit icon
 .
.
To discard your changes, click the Cancel icon ![]() then on Delete.
then on Delete.
Messages that have been edited are labeled as such.
Delete a message
Any member may delete their own messages. If you are the Owner of the teamspace, you can also moderate the conversation by deleting messages of other members if necessary.
-
Hover over the message and click the Delete icon
 .
. -
Click Delete again to confirm.
React to a message
-
Hover over the message and click the React icon
 .
. -
In the pop-up window, select an emoticon.
Reply to a message
-
Hover over the message and click the Reply icon
 .
. -
Enter your reply and click
or press the Enter key.
Share a file in the team discussion
-
From your teamspace file manager, select the document(s) you want to share.
-
Click the Share button along the top of the page and select In the discussion.
-
If you want to, you can also add a message to your share.
-
When you have finished, click Send.
The document is added to the team discussion. Your colleagues will be able to access the file location by clicking Access or directly open the document by double-clicking its name.
Start a videoconference from a team discussion
Please note
The videoconferencing feature is currently unavailable, but will be deployed soon in the Public Cloud environment. For more information, please contact your sales representative.
You can start a videoconference with your space members from your team discussion.
Start a video call
-
From the home page of your Oodrive Work application, click the teamspace in which you want to start a videoconference.
-
In the navigation panel, click Discussion.
-
In the open discussion, Click the Start a Call icon
 .
. -
Your video call will open in a new tab.
If prompted, allow the browser to access your device's microphone and camera.
-
From your videoconference lobby, configure your microphone, camera, and audio/video settings:
-
Microphone: select, enable, or disable your microphone.
-
Camera: select, enable, or disable your camera.
-
Settings: apply a background effect (none, blur, or illustration) and configure audio options (Enhanced Noise Cancellation, Echo Cancellation, Voice Isolation).
-
-
Start the videoconference by clicking Join room.
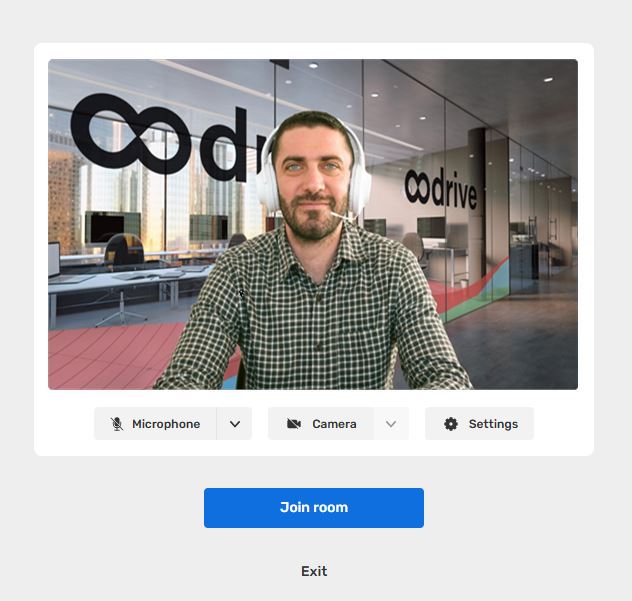
Team discussion members are notified that the call has started and can join you.
Please note
A Partner-type collaborator can start a video call from any teamspace or direct discussion they have been added to.
Join an ongoing call
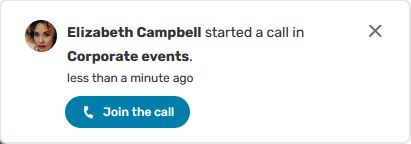
When someone starts a call in a team discussion, you are notified by a ringtone and a notification. You may join the ongoing call by doing either of the following:
-
If you see the call notification: click Join the call to join the call.
-
If you missed the call notification, You can join the call while it is in progress.
To do so, open the discussion with an ongoing call and click on the Join the call button
.
Options available during a call
During a video call, you can perform the following actions:
|
Videoconferencing options |
|
|---|---|
|
|
Microphone
|
|
|
Camera
|
|
|
Share screen
|
|
|
Discussion
|
|
|
Members
|
|
|
Invite to join
|
|
|
Reactions
|
|
|
Raise hand
|
|
|
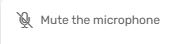
Mute the microphone
|
|
|
Remove from call
|
|
|
Settings
|
|
|
Leave
|
|
|
Call back
|


Member status during a call
During a videoconference, you can follow the responses of guests in real time, including those who have not yet joined the call, using the Members button ![]() .
.
The status of guests who have not yet joined the call is displayed in the Others section.
|
Status |
Description |
|---|---|
| Calling... | The call notification and ring tone are active at the recipient's end. |
| Rejected | The recipient rejected the call. |
| No reply |
The recipient did not answer the call or is not logged into their Oodrive account. |
| Left | The recipient joined the call and then left it. |
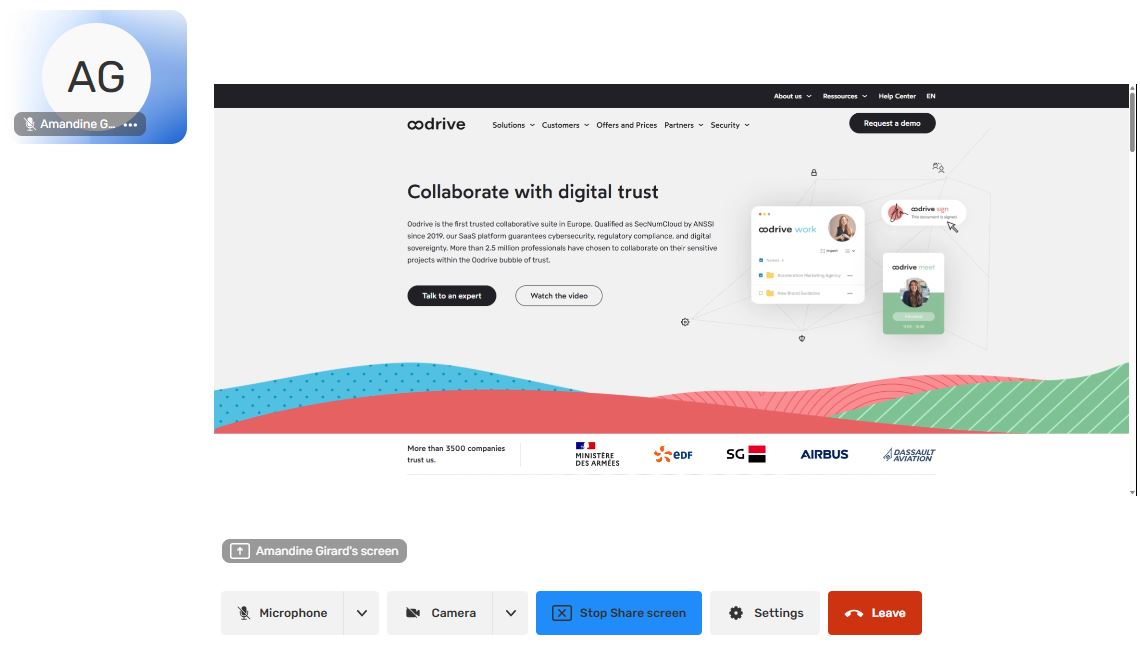
Share your screen during a call
-
During the call, click Share screen.
-
Choose what you want to share:
-
Entire screen: to show everything displayed on your desktop.
-
Application window: to show only one program window (PowerPoint, browser, etc.).
-
Browser tab: useful for sharing only a single web page.
You can also share audio when sharing a tab or screen.
-
-
Click Share.
The shared screen is now visible to all participants.
-
Depending on the type of screen share, a banner will appear, allowing you to manage your screen sharing options. These may vary depending on the type of screen share
-
When sharing a tab: A fixed banner along the top of each tab in your browser allows you to:
Stop sharing,
Modify the shared tab,
Return to the videoconference,
Return to the shared tab.

-
When sharing a window or the entire screen: a floating banner allows you to stop sharing. You can hide it if you wish.

-
-
You can stop screen sharing at any time by clicking Stop Share screen from the videoconference tab.
Please note
Multiple participants can share their screens at the same time during a videoconference. Each participant can then freely choose which screen they want to focus on.
Set up an activity summary
You can subscribe to an activity summary for each teamspace you are a part of, regardless of whether you are a Guest, Member or Owner.
This allows you to track activities in real time and keep up to date with the latest actions of your collaborators, improving transparency in your project management.
-
From the home page of your Oodrive Work application, click on the teamspace for which you want to receive an activity summary.
-
In the menu on the left, go to the teamspace tile and click on the icon Manage my activity summary
 .
.
-
Activate the feature, then use the drop-down menu to select the sending frequency:
Immediately
Every hour
Every day
Every week
Every month
-
When you have finished, click Save.
The activity summary will be sent to you by e-mail at the frequency you have chosen.
You can return at any time to the Manage my activity summary menu to deactivate the summary or change its frequency.
Manage documents in a teamspace
Each member of a teamspace can intervene on the files it contains according to the rights granted by their profile (Owner, Member or Guest).
As an Owner or Member of a teamspace, you can interact with its documents as you would in My space. As a Guest, you only have permission to view and download documents.
For further information, please consult the following resources:
Document management: Managing your sensitive documents.
Rights granted by profile within a teamspace: Permissions summary.
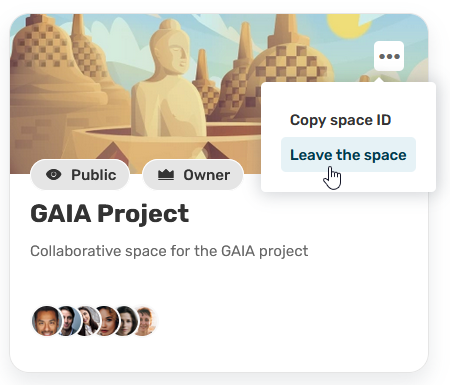
Leave a teamspace
You can leave a teamspace at any time.
From the home page of your Oodrive Work application, click on the three dots on the tile of the teamspace you want to leave and select Leave the space.
Attention
If you are the last Owner of a teamspace, you must first designate a new Owner before being able to leave.
Resources