 Help Center
 Go to Oodrive
Creating a signature campaign
A signature campaign is a group sending method that makes it possible to have contracts signed in bulk. This method allows you to have one or more documents signed by a large number of signatories via an automated system.
To do so, you must prepare a list of recipients in CSV or XLSX format and select either a shared contract or an archive containing contracts specific to each signatory. Oodrive Sign will use these elements to send all signature emails on the date and time of your choice.
This group sending method is particularly useful when you need to transfer contracts to a large number of signatories.
Step 1: Initiate the campaign
You can choose between two distinct campaign modes, depending on whether your signatories all need to receive the same contract, or different contracts. Two campaign modes are available for this purpose.
-
Create a campaign based on a document or a template: You can upload a PDF document or use a contract template that will be signed by all campaign recipients.
-
Create a campaign based on multiple documents: You must prepare an archive containing all of the documents you want the recipients of the campaign to sign.
Create a campaign from a document or a template
-
On the home page, select Create a campaign.
-
Click Create a campaign based on a document or a template.
-
Perform one of the following actions to add the contract for signature:
-
To upload a contract from your computer: Click Add PDF documents, then browse the file manager and select the PDF document for signature.
-
To select a template: Click Choose an existing template and select one from the available templates. You can use the search bar to find your chosen template more easily.
-
-
Click Next.
Create a campaign from several documents
-
On the home page, select Create a campaign.
-
Click Create a campaign based on multiple documents.
-
Click Add your ZIP, then browse the file explorer on your computer to select the .zip archive containing the contracts for signature.
-
Click Next.
Step 2: Upload the signatories
-
Click Download an example .csv file or Download an example .xls file to download an import template.
The downloaded template will vary depending on the campaign type and the Smartfields® contained in the selected contract or template.
-
Open the file and use the pre-filled examples provided in each column to complete each line with the information required for each of your signatories.

-
Once the file has been completed—and you have made sure to fill in all the required columns and any Smartfields® present in your contract—save the file on your computer.
-
Go back to your browser and click Import your file containing signatories in .csv or .xls format to select the file saved on your computer.
An import summary appears on your screen, so that you may check that your signatories’ data is consistent:

If you see that the automatic interpretation of columns by Oodrive Sign is not as you expected, click the title of a column to edit the associated field.
In addition, if errors occurred during import, the fields in question will be highlighted in red and the See errors button will give you a detailed report to assist you in identifying and correcting them. If necessary, you can click Import a new .csv file to reimport your corrected import file.

-
Once the import has been successfully completed, click Next.
Step 3: Launch the campaign
-
Select your chosen signature mode for your signature campaign.
Please note
Some remote signature modes allow you to modify the subject and body of the email notification sent to your signatories, and to define a campaign launch date by enabling the Delay sending documents setting.
-
When you have finished, click Apply. A summary of signatories is shown on the screen.
-
Click Launch campaign to allow Oodrive Sign to create the associated transactions.
This step can take several minutes, depending on the number of transactions being processed, and will not start until the selected date in the case of delayed sending. To return to your activities on the signature platform without waiting, click Close and continue in background.
A confirmation message appears on the screen, informing you that the campaign is being published. You can click Follow my campaign to track your campaign.
Step 4: Monitor the campaign
An electronic signature campaign dashboard is available on Oodrive Sign, letting you track operations in progress and take action if necessary.

-
Click Campaigns in the menu along the top of the screen to display the list of your signature campaigns. Here you will find the following information:
-
Campaign name: by default, this is the contract template name
-
Date the campaign was created on
-
Status of the campaign
-
In progress (the campaign is being sent)
-
Sent (the entire campaign has been sent for signature)
-
-
Type of campaign: remote or face to face
-
Created by: user who created the signature campaign
-
Signed contract(s): number of signed contracts
-
-
If you'd like, use the filters in the panel on the left side of the screen to filter your campaigns according to your chosen criteria: name of contract, status of campaign, signatory, start and/or end date, signature mode, user who created the campaign.
-
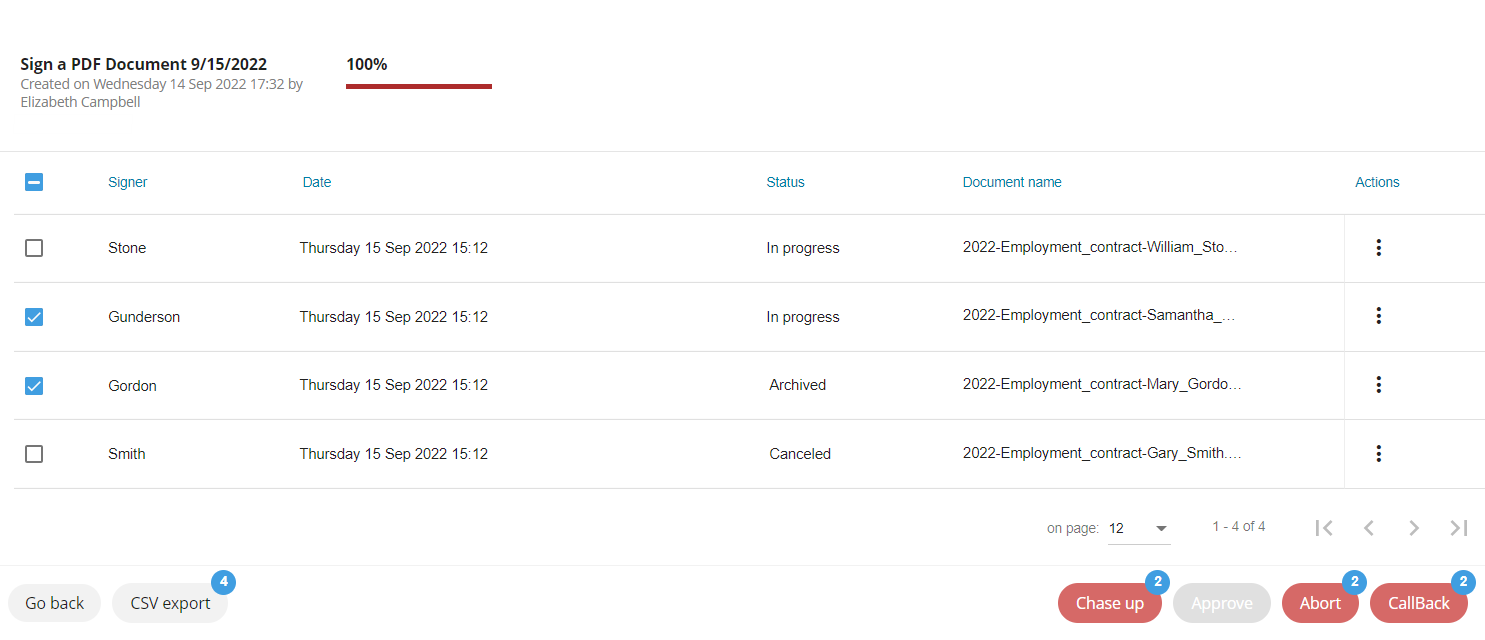
Click a campaign to display all contracts for this campaign and monitor their progress.
For each of them, you will see:
the signatory
the sending date
the status of the contract (in progress, to approve, approved, archived, canceled)
the name of the document
-
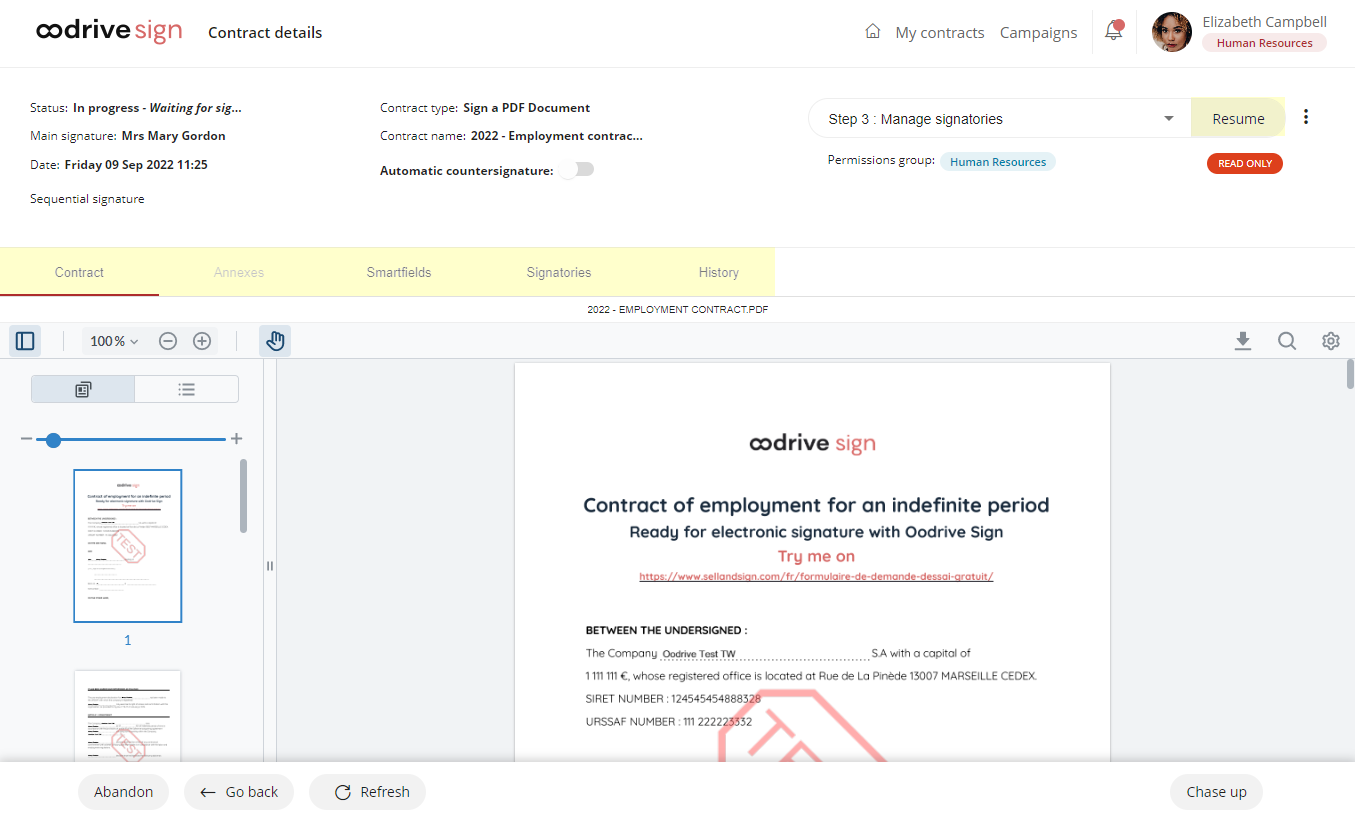
If you wish to view information for a specific contract, click that contract to access its detailed view.
From the campaign overview, you can click the three dots in the Action column to perform quick actions on each contract.
You can also select several contracts and perform group actions using the Chase up, Approve and Abandon buttons.
You can also find contracts for a campaign in the My contracts menu, from where you can track the progress of a transaction, countersign it or even modify it. If you want to manage the campaign contracts individually, see the section Managing your contracts.
Ressources