 Help Center
 Go to Oodrive
Installing and configuring WebSynchro manually
Install WebSynchro
To install the WebSynchro plugin, download its executable file from the Oodrive Work_share or Oodrive Work web application.
Escalated “Administrator” permissions are required during installation to enable the plugin to interact with the file explorer context menu.
Please note that you can run a silent installation to avoid manual intervention on each user's computer
Download and install WebSynchro
-
Go to your collaborative application.
-
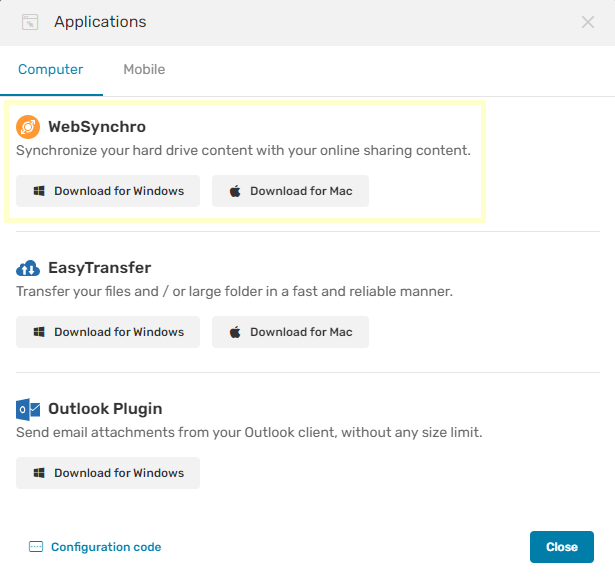
Click your profile in the upper-right corner of the screen and select Applications.
-
Go to the WebSynchro section, then download the application for Windows
-
In the window that appears, copy the Configuration code to fill in during installation.
-
Go to your Downloads folder and double-click the WebSynchro-xxx.exe installer.
-
Follow the steps in the installation wizard.
-
Once the application has been installed, ask the user to log in using their login and password.
You can then help them set a default synchronization folder and configure the application.
Configure WebSynchro
Users can configure and manage WebSynchro manually on their computer.
Set a default synchronization folder
When users first log in to WebSynchro, they can set a default synchronization folder on their computer.
This step makes it easier to set up the first synchronization, but is not mandatory.
-
When you first log in, click Browse to choose a default synchronization folder, and rename it if necessary.

-
Click Yes to confirm your selection. A folder with the same name is created at the root of your online workspace.
General settings
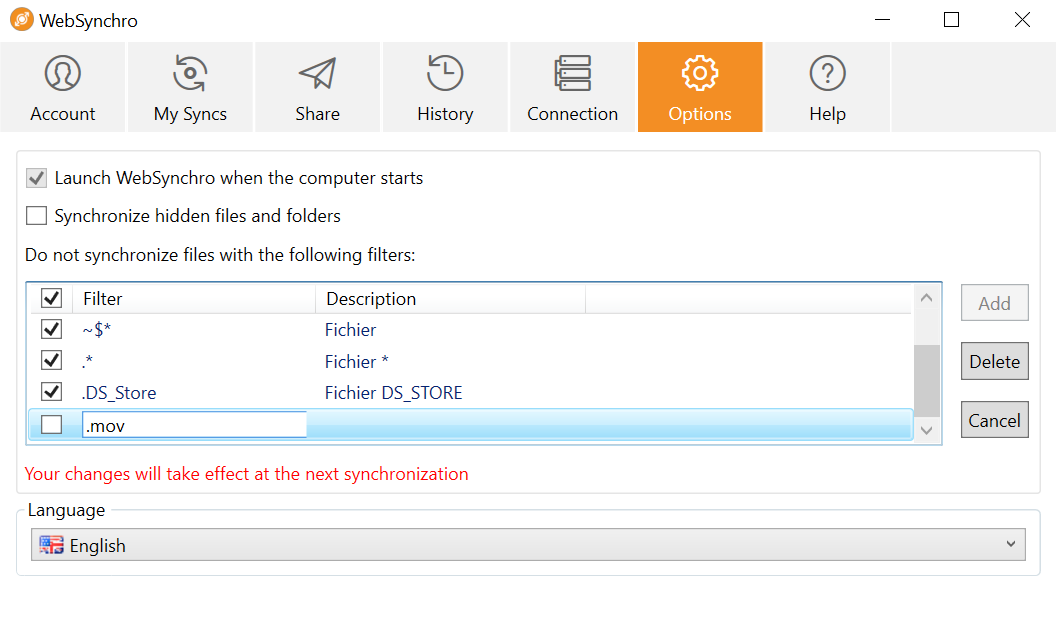
In the Options tab, users can manage the application’s general options. They can choose to:
-
Always launch WebSynchro when the computer starts up
-
Synchronize hidden local folders and files
-
Set filters for file extensions not for synchronization
-
Change the language of the application (French, English, Spanish, Dutch, German)
Extension filters
Extension filters allow users to exclude specific files with a particular extension from their synchronizations.
Define a new extension filter
-
Access your WebSynchro application.
-
In the Options tab, Click Add, then enter a new extension. Example: ".mov":
-
Press the Enter key on the keyboard to confirm the entry.
-
Click OK at the bottom of the window to apply the changes and take this new filter into account in future synchronizations.
Remove an extension filter
-
Access your WebSynchro application.
-
In the Options tab, select the filter you want to remove, then click Delete.
-
Click OK to confirm your choice.
-
Click OK again to apply the changes.
Network settings
In the Connection tab, users can manage other options related to the Internet connection of his computer, namely:
-
Set bandwidth limits for upload and download.,
-
Define the settings for using a proxy.
Bandwidth limits
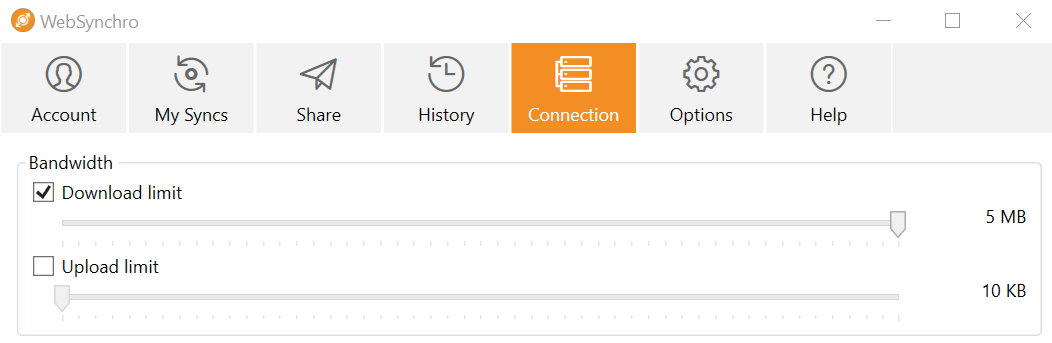
Users can limit the bandwidth on their WebSynchro application in order to optimize its distribution when their connection is limited.
-
Access your WebSynchro application.
-
In the Connection tab, check the Download limit or Upload limit box, then move the cursor to choose its value, ranging from 10 kb/s to 5Mb/s.
-
Click OK to apply the changes.
Use of a proxy
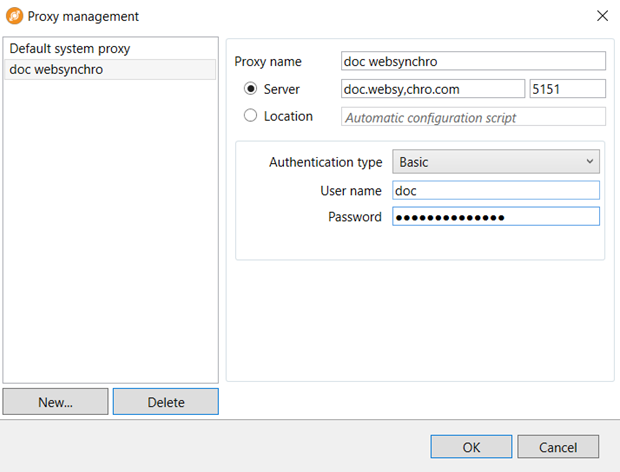
If a specific proxy server is set up for the company, users must configure it in the application.
-
Access your WebSynchro application.
-
In the Connection tab, select Use the following proxy to connect to the internet to bring up the proxy management window.
-
Click New… and enter the proxy information for the company.
-
Once you have entered the information, click OK to save the settings.
Ressources