
Creating new accounts
Account types
When you create new accounts for colleagues on your workspace, you have the choice between two types of accounts: the User account and the Contact account.
Please note
The Contact account type is mainly used by the Oodrive Work_share and Oodrive Work applications. If neither of these applications is available on your workspace, it is not necessary for you to create Contact accounts.
| Users | Contacts |
|---|---|
|
The User account type is suitable for anyone who needs to access all application features available on your workspace.
|
The Contact account type is suitable for anyone who simply needs to access the workspace to interact with items made available to them by Users.
|
Special case: restricted permissions
This section is dedicated to administrators of Oodrive Work.
The Oodrive Work solution allows you to restrict a User account's permissions on teamspaces.
Once enabled for a User account, this option will :
-
prevent them from creating teamspaces (public or private).
-
prevent them from viewing and requesting to join public teamspaces.
These restrictions are particularly suitable for people external to your organization or profiles requiring a limited scope of action.
|
Description of account scopes |
||||
|---|---|---|---|---|
| User account | User account with restricted permissions | Partner account (Contact) | ||
|
Create a teamspace |
• | |||
|
View the list of public teamspaces |
• | |||
|
Join an open access public teamspace |
• | |||
|
Request to join a public teamspace that requires validation |
• | |||
|
Be invited to a public or private teamspace |
Can join or be added to an unlimited number of teamspaces |
Can be added to an unlimited number of teamspaces | Can be added to only one teamspace at a time | |
|
Obtain the Guest or Contributor role |
• | • | • | |
|
Obtain the Owner role |
• | • | ||
|
Access My space |
• | • | ||
Create a new account
-
In the navigation panel on the left side of the page, click Create and select the account type to create: User or Contact.
Note
If you only own the Oodrive Save or Oodrive Media, you will only be able to create User accounts, via the Create a user button.
-
You must complete all required fields regarding the person for whom you are creating the account:
-
First and last name
-
Email address
-
Username (optional for Contacts)
Note
If you want to create a Partner account in Oodrive Work, you need to enter a login for your Contact and make the account visible to others. Once authenticated, your Contact will be able to access the collaborative shares and the teamspace made available to them.
-
Account status ("open" by default)
-
Two-factor or passwordless authentication (if the option is enabled)
Careful
If the use of an SMS code has been activated, a mobile phone number must be provided. Likewise, if the security key is activated, the user must have a Yubikey device at their disposal.
-
Email message language preference
-
The owner of the Contact
You can also fill in the optional fields as needed and assign additional applications to your users if you have the necessary licenses.
-
-
The Manual authentication mode is set by default. If you want this account to authenticate via an external identity provider (LDAP, SAML, OpenID, etc.), select one of the options defined by the Access Management module administrator.
-
If you would like to make the account visible to all workspace users, you must check the option Visible to other users.
Note
In the Oodrive Work solution, User and Contact accounts must be visible to others in order to participate in teamspaces.
-
When creating a User account for the Oodrive Work application, you can check the Restricted permissions option if you want to limit the scope of action of this User.
For more information on restricted permissions, please refer to the section Special case: restricted permissions.
-
If automatic account suspension is activated for your workspace, you can prevent this account from being suspended by checking the Prevent automatic account suspension option.
-
Click Save.
An email notification will be automatically sent to each colleague to inform them that a new account has been created in their name, unless you deselect the Send creation email option.
To access created accounts, click Users or Contacts in the navigation panel along the upper-left side of the page.
Create accounts in bulk
Importing using CSV or XLSX file types allows you to automate the creation of new accounts. Two pre-filled file templates are available - the Users template and the Contacts template - allowing you to quickly prepare the import file with all the personal details and account options for each of your workspace colleagues.
If your workspace has both User and Contact accounts, you must follow the following steps:
Step 1: Make two separate lists identifying those individuals requiring a Contact or User account.
Step 2: First prepare the Users template for import.
Users will be able to access all workspace application features and will have their own list of Contacts (which may be visible or hidden to other Users).
Step 3: Prepare the Contacts template for import by associating each Contact with a User. You must also choose whether each account should be made visible on the workspace.
Import a list of Users
-
In the navigation panel on the left side of the page, click the Users section.
-
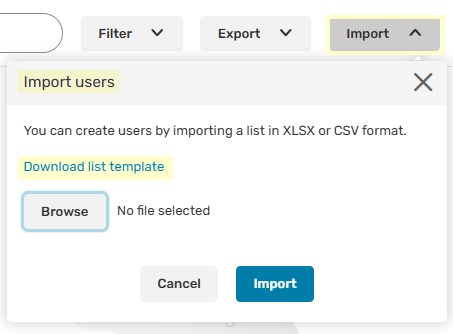
Click Import in the upper-right side of the page.
-
Click Download list template to start downloading the list template in XLSX format in your browser.
-
Open the file and fill out each line with the required information for each of your users, based on the pre-filled examples in each column. Below is a table providing explanations to help guide you in preparing the XLSX file.
-
Once you’ve completed the form, according to the formats provided and taking care to fill in all required fields, save the file to your computer.
-
Return to the Import button in the top-right part of the page and click Browse to select the file saved on your computer.
-
Click Import along the bottom of the menu.
|
Key |
Explanation |
|---|---|
|
LASTNAME* |
Required field |
|
FIRSTNAME* |
Required field |
|
EMAIL* |
Required field |
|
STATUS* |
Required field Three account statuses are possible: ACTIVE / INACTIVE / CLOSED (active, inactive, closed) |
|
LOGIN* |
Required field Various formats are allowed: last name.first name/ first name.last name / firstname.lastname@company.com |
|
MAIL_LANGUAGE* |
Required field The preferred email notification language: en / to / of / nl / are / it / pt - br / zh - cn / ja / th |
|
SHARE_SPACE_MAX* |
Required field for Oodrive Work, Oodrive Work_share and Oodrive Meet users. If you are not implementing any of the solutions listed above, you can leave this field blank. The storage space allocated to the user: GB = Gigabyte KB = Kilobyte |
|
SAVE_SPACE_MAX* |
Required field for Oodrive Save
If you are not implementing Oodrive Save, you can leave this field blank. The storage space allocated to the user: GB = Gigabyte KB = Kilobyte Careful: When implementing Oodrive Save, you must allocate at least 1 Gigabyte of storage space to your users. |
|
VISIBILITY_SCOPE |
The visibility of the user to others on the platform: PUBLIC / PRIVATE (public or private) Important: If you are implementing Oodrive Saveor Oodrive Media, enter “PUBLIC”. |
|
MODIFICATION_PREVENTION |
Two options are possible: YES / NO If you put "YES ", the user will not be able to edit their profile information. Prerequisite: You must also activate this option in the Settings. |
|
COMPANY |
The company of the person associated with the account |
|
COMPANY_DEPARTMENT |
The Department of the person associated with the account |
|
FUNCTION |
The job position of the person associated with the account |
|
TFA |
Passwordless or two-factor authentication, depending on the Access Management module settings Four possible options: TOTP / NONE / SMS / FIDO2 TOTP = temporary code (time-based one-time password) NONE = none SMS = the code received via SMS, available if the SMS module has been set up for your workspace FIDO2 = Yubikey security key and PIN Careful: If you specify an authentication mode (TOTP, SMS or FIDO2), it will not take effect until activated in the Access management module. |
|
CITY |
The city of the person associated with the account |
|
ADDRESS |
The address of the person associated with the account |
|
ZIPCODE |
The postal code of the person associated with the account |
|
COUNTRY |
The country of the person associated with the account |
|
PHONE |
The mobile phone number of the person associated with the account Careful: When authentication via SMS is enabled, you must complete this field, otherwise the employee will not be able to log in to the platform until you enter their correct mobile phone number. |
|
BIOGRAPHY |
The biography of the person associated with the account |
|
CREATION_DATE |
This field is automatically filled during import |
|
SUSPENSION_DATE |
On this date, the account status will change to 'INACTIVE' (suspended): dd/mm/yyyy/hh:mm |
|
CREATION_NOTIFICATION |
Two possible options: YES or NO If you put ‘YES’, the user will receive an email when their account is created. Careful: To perform a silent install of Oodrive Save, enter “NO”. |
|
EXPIRATION_MODE |
Two possible options: DEFAULT or DISABLED If you enter "DEFAULT", automatic suspension and expiration of the acccount will trigger when the criteria set in the "Settings" section of the Users module are met. If you enter "DISABLED", the account suspension and expiration will never occur automatically. |
|
RESTRICTED_RIGHTS |
Two possible options: YES or NO If you put ‘YES’, the user will have a user account with restricted permissions. For more information on restricted permissions, please refer to the section Special case: restricted permissions. |
Note
It is very important that you follow the language and formatting of pre-filled items in the form to avoid errors when importing.
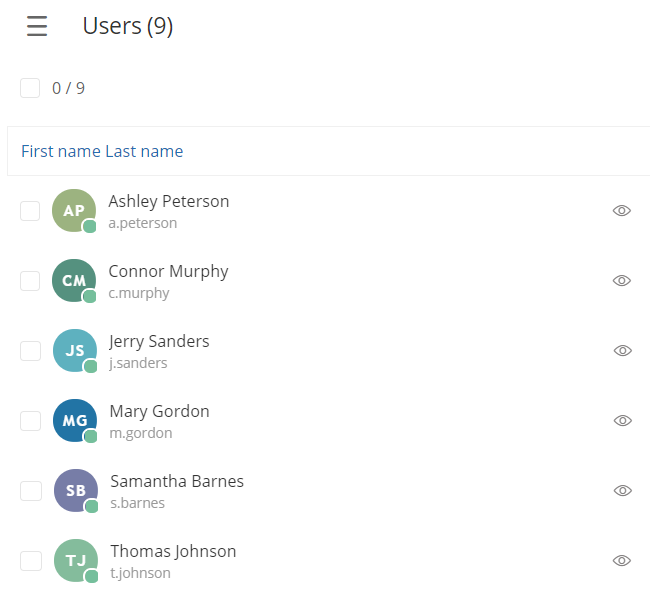
Below is an example of a list of Users viewed after completing the import.
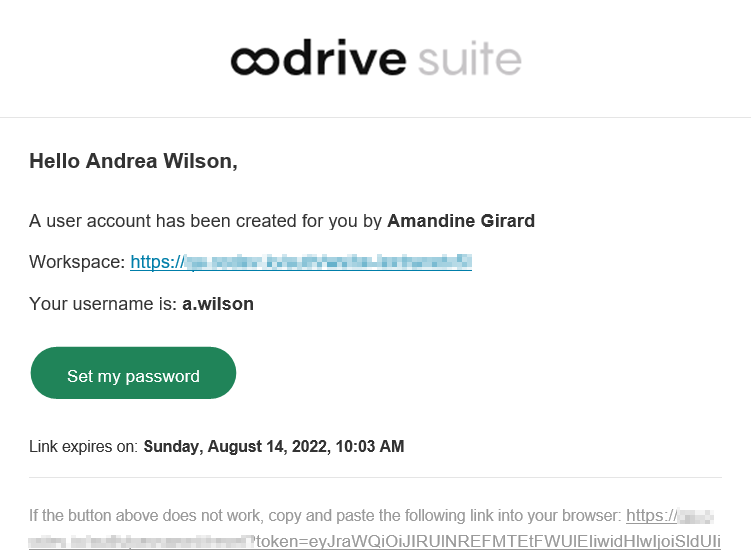
If you enabled this option, an email notification will be automatically sent to each colleague to inform them that a new account has been created in their name:
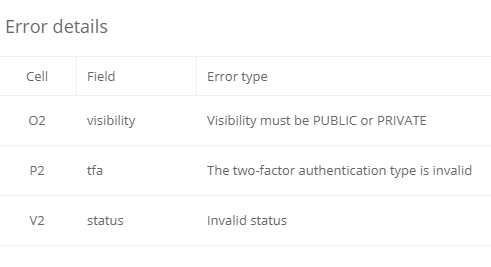
If an error occurs, you will see the following error message. Click See details to view the error details.

In the error details, the cells containing errors are identified with a description of the error type so that you can correct each one and reimport the file.
Import a list of Contacts
-
In the navigation panel on the left side of the page, click the Contacts section.
-
Click Import in the upper-right side of the page.
-
Click Download list template to start downloading the list template in XLSX format in your browser.
-
Open the file and fill out each line with the required information for each of your contacts, based on the pre-filled examples in each column. Below is a table providing explanations to help guide you in preparing the XLSX file.
-
Once you’ve completed the form, according to the formats provided and taking care to fill in all required fields, save the file to your computer.
-
Return to the Import button in the top-right part of the page and click Browse to select the file saved on your computer.
-
Click Import along the bottom of the menu.
|
Key |
Explanation |
|---|---|
|
OWNER_LOGIN * |
Required field Every Contact belongs to a User account. You must enter their username |
|
LASTNAME * |
Required field |
|
FIRSTNAME * |
Required field |
|
EMAIL* |
Required field |
|
STATUS * |
Required field Two account statuses are possible: ACTIVE / CLOSED |
|
LOGIN |
Various formats are allowed: last name.first name/ firstname.lastname / firstname.lastname@company.com |
|
VISIBILITY_SCOPE * |
The visibility of the Contact to others: PUBLIC / PRIVATE (public or private) |
|
MODIFICATION_PREVENTION |
Two options are possible: YES / NO If you put "YES ", the contact will not be able to edit their profile information. Prerequisite: You must also activate this option in the Settings. |
|
COMPANY |
The company of the person associated with the account |
|
COMPANY_DEPARTMENT |
The Department of the person associated with the account |
|
FUNCTION |
The job position of the person associated with the account |
|
TFA |
Passwordless or two-factor authentication, depending on the Access Management module settings Careful: If you specify an authentication mode (TOTP, SMS or FIDO2), it will not take effect until activated in the Access management module. Four possible options: TOTP / NONE / SMS / FIDO2 TOTP = temporary code (time-based one-time password) NONE = none SMS = the code received via SMS, available if the SMS module has been set up for your workspace FIDO2 = Yubikey security key and PIN Careful: If a Contact needs access to Oodrive Sign only, indicate “NONE”. |
|
CITY |
The city of the person associated with the account |
|
ADDRESS |
The address of the person associated with the account |
|
ZIPCODE |
The postal code of the person associated with the account |
|
COUNTRY |
The country of the person associated with the account |
|
PHONE |
The mobilephone number of the person associated with the account Careful: When authentication via SMS is enabled, you must complete this field, otherwise the employee will not be able to log in to the workspace until you enter their correct mobile phone number. |
|
BIOGRAPHY |
The biography of the person associated with the account |
|
MAIL_LANGUAGE * |
Required field The preferred email notification language: en / to / of / nl / are / it / pt - br / zh - cn / ja / th |
|
CREATION_DATE |
This field is automatically filled during import |
|
SUSPENSION_DATE |
On this date, the account status will change to 'INACTIVE' (suspended): dd/mm/yyyy/hh:mm |
|
OWNER_FIRSTNAME |
Every Contact belongs to a User account. You must enter that User’s first name. |
|
OWNER_LASTNAME |
Every Contact belongs to a User account. You must enter that User’s last name. |
|
CREATION_NOTIFICATION |
Two possible options: YES or NO If you put ‘YES’, the user will receive an email when their account is created. Careful: If a Contact needs access to Oodrive Sign only, indicate “NONE”. |
Note
It is very important that you follow the language and formatting of pre-filled items in the form to avoid errors when importing.
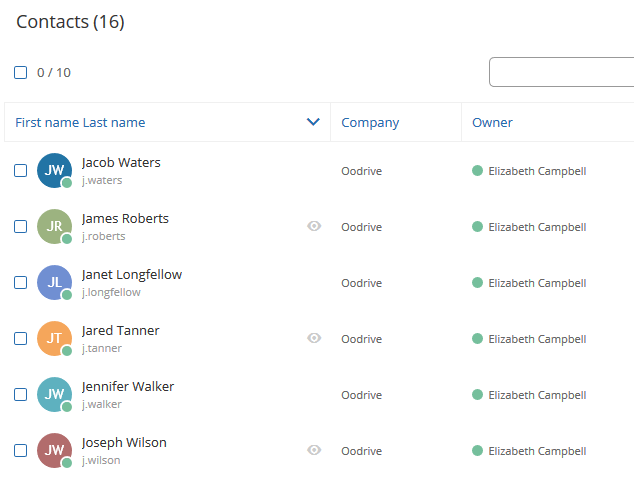
Below is an example of a list of Contacts viewed after completing the import.
If an error occurs, you will see the following error message. Click See details to view the error details.
In the error details, the cells containing errors are identified with a description of the error type so that you can correct each one and reimport the file.
Resources