 Help Center
 Go to Oodrive
Monitoring workspace activity
Track activities performed on the workspace by Users, Contacts and Anonymous Contacts (without a login).
You can monitor the activities performed on every application of your workspace, and you can also create and schedule reports regarding these activities.
The table below lists the applications associated with each Activities module filter:
|
"Service" Filter Value |
Application |
|---|---|
|
oodrive_platform |
|
|
Users |
|
|
Authentication |
|
|
Share administration |
|
|
oodrive_share & oodrive_collaborate |
|
|
Media |
|
|
oodrive_meeting |
|
|
Office Online |
|
|
Collabora Online |
|
|
CHAT-PROVISIONING |
|
|
Teamspace |
|
|
Oodrive_legal_Notice |
|
Please note
In compliance with regulations, activity logs are only retained for a period of 12 months.
View an event
The Activities view in the Activity log section allows you to view all workspace activity.
Click on the event of your choice to display the information panel.

You will then be able to browse the information panel tabs to view the event details. The available tabs are:
Event: general information about the event (date, service, event type)
User: information about the user who performed the action (name, account type, username, email address, company)
Details: technical information specific to the event type
Filter the activity log
-
In the navigation panel along the left side of the page, click the Activity log section and select Activities.
-
Use the filter options above the events list to focus your search on specific activities. You can filter by:
Time period: last 24 hrs, last 7, 30 or 90 days, or custom range
Services: business applications, administration modules and Oodrive Suite services
Events: action performed by the user
The event list is filtered according to the selected criteria:

You can also modify the order in which the events are displayed. By default, the list is ordered from the most recent to the oldest event :
Click on the Date column heading to change the order in which the events are displayed (from oldest to most recent, and vice-versa). An arrow indicates the sorting order.
Click on the User column heading to sort the list alphabetically by last name of users.
-
To remove the applied filters and return to the full view of the activity log section, click Reset.
Save filters
Saving filters allows you to quickly access relevant information and generate scheduled reports focused on specific activities.
-
In the Activity log section, select Activities.
-
Use the filter options above the events list to focus your report on specific activities (time period, services, events).
-
To the right of your filters, click the Save your filters
 button.
 -
Enter the name of your new filter and click Save.
To apply your saved filter to the events list, select the filter in the My filters section and click Open.
Modify filters
You can make changes to your saved filters at any time in the My filters menu. However, you cannot rename an existing filter: if you want to change the name of a filter, you must recreate it.
-
In the Activity log section, select My filters.
-
Select the filter you want to modify to view filter details.
-
In the panel on the right, click Open.
-
Use the filter options above the events list to make changes to your filter settings.
-
When you have finished, click the Save modifications
button. -
Click the Quit filter view
 button to return to the full activities view.
Delete filters
-
In the Activity log section, select My filters.
-
Select the filter you want to delete.
-
In the panel on the right, click Delete.
-
Click Delete again to permanently delete the selected filter.
Generate an instant report
You can generate instant tracking reports regarding
-
In the Activity log section, select Activities.
-
Use the filter options above the events list to focus your report on specific activities (time period, services, events).
-
In the upper-right corner of the page, click Export and select a file format :
-
Full Export - JSON Format
-
Full Export - CSV Format
-
Audit Export - CSV Format
Please note
The audit export is more concise than the full export and particularly useful for highlighting the most important information in the report, especially those relating to collaboration.
-
-
In your web browser, a CSV or JSON file will download.
Click on the downloaded file to open.

Schedule a report
Automate the report generation process on a daily, weekly, and/or monthly basis. Automatic reports are generated from a saved filter, so that the Oodrive platform can filter workspace activities to only include the most salient tracking data.
Once a scheduled report has been auto-generated, you will automatically receive an email containing a download link to the new report in CSV or JSON format.
Requirements
To schedule a report, you must have already saved a filter. If you have not saved any filters yet, please refer to the section Save filters.
-
In the navigation panel, click the Scheduled reports section.
-
In the upper-right corner of the page, click New report.
-
Enter the Report name. Your report will display under this name in the Scheduled reports section.
-
Select a filter among those you have saved. It will be used to define the scope of the report.
-
Select the frequency (Every day, Every Monday, Every month) to autogenerate the report.
-
Click Create.
A confirmation message will appear confirming that the report has been successfully planned.
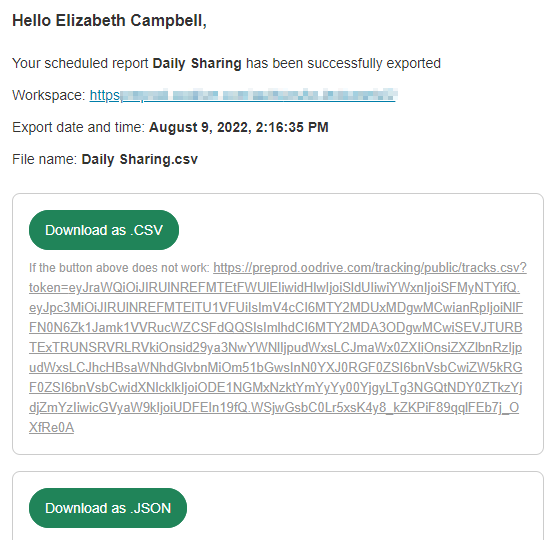
Below is an example of the email notification received following a scheduled report. The new report can be downloaded locally by clicking on Download as .CSV or Download as JSON.
Modify a scheduled report
You can find all your scheduled reports in the Scheduled reports section. Click on the report of your choice to:
Make changes to the report
Deactivate or reactivate the report temporarily
Delete the report permanently
Modify an existing report
-
In the navigation panel, click the Scheduled reports section.
-
Select the report you want to modify.
The details of the selected report are displayed in the panel on the right (date created, filter, sending frequency).
-
Along the bottom of the panel, click Edit.
-
Update the form, then click Edit to save your changes.
Deactivate or reactivate a report
-
In the navigation panel, click the Scheduled reports section.
-
Select the report you want to deactivate/reactivate.
The details of the selected report are displayed in the panel on the right (date created, filter, sending frequency).
-
Click on the toggle switch to the right of the report name.

A blue toggle switch indicates that the report is enabled.

A gray toggle switch indicates that the report is disabled.
Delete a report
-
In the navigation panel, click the Scheduled reports section.
-
Select the report you want to delete.
The selected report's details are displayed in the panel on the right (date created, filter, sending frequency).
-
Along the bottom of the panel, click Delete.
-
Click Delete again to permanently delete the scheduled report.
Ressources