 Help Center
 Go to Oodrive
Having a document signed
You can have a document signed by one or more signatories.
Please note
There are several steps to the process of creating a contract and sending it for signature, but you can pause the process at any time. You can then go back to your draft in the My contracts section to continue creating it where you left off.
Step 1: Upload the contract
This step consists in uploading the document for signature. If contact templates are already available for your Oodrive Sign license, you can also choose a template for your home page and go directly to the next step.
-
On the home page, select Sign a document.
-
Click Add documents.
-
Browse through the file explorer on your computer and select the PDF document(s) requiring signature.
Please note
-
The total file size must not exceed 50 MB.
-
If you select several documents, they will be merged.
-
For optimal results, we recommend that you import your files in PDF format.
Tip
If you'd like, you can use the side panel to add other documents to your transaction and merge them. You can also drag and drop the documents to set the order in which they will appear.
-
-
If you want to add annexes and/or collect them from your signatory, click See annexes.
-
To add an annex, click Add an annex and upload your chosen document.
-
To collect an annex from a signatory, click Collect from an annex during remote signature.
Next, enter the information for the collection (name, size, and number of files, required or non-required status) and click Approve.
-
-
Click Next to move to the next step.
Step 2: Customize the contract
If the contract you need to have signed contains Smartfields® (fields for collecting variable content), you can customize your contract by entering their values yourself, or by collecting the required information from a remote signatory.
Step 1: Complete the Smartfields®
You can choose to complete some or all of the Smartfields® in the contract yourself without using remote collection, especially when signing face to face.
-
To complete Smartfields®, enter their values in the panel on the right.
Tip
To see the information you have entered appear on the contract preview, click the banner with the message "The document is out of date. Click here to refresh it".
-
If you have completed all of the Smartfields® required for the transaction, click Next. Otherwise, go to the next step to collect information from a remote signatory.
Step 2: Collect information from a signatory
If your transaction includes at least one remote signatory, you can collect information from that signatory.
Please note
If the transaction includes several remote signatories, the first one to sign must complete the Smartfields®.
-
Browse the panel on the right and click the
 icon to edit a Smartfield®.
 -
Specify the required data type. To do this, you can:
Edit the Field name (in other words, the title under which it is presented to the signatory)
Specify the required data type for this field (text, date, number, multiple choice, IBAN, social security number, etc.)
-
Enable the Collect the Smartfield based on a signature setting.
If the Smartfield® is essential to the transaction, also enable the Smartfield required setting.
-
When you have finished, click Approve.
-
Repeat the previous steps as many times as necessary to configure the other Smartfields® that you need to collect from a signatory.
Tip
When your configuration work is complete, you can choose to create a template from your customized contract by clicking Save as template.
-
When you have finished, click Next.
Step 3: Define the signature process
Add pre-approvers
Pre-approvers are individuals (often colleagues from the same company) who will each receive an email, one after another, to pre-approve the contract before it can be sent to remote signatories.
-
In the side panel, click the + sign to the right of the Pre-approver section.
-
Select the person who needs to pre-approve your contract from the signatory directory, then click Next.
Note
If that person is not in the directory, you can click Create a new pre-approver to add them.
-
In the Select signatories window, enable the Add this signatory in pre-approval mode setting. If you want to notify the pre-approver by SMS, enable the corresponding setting.
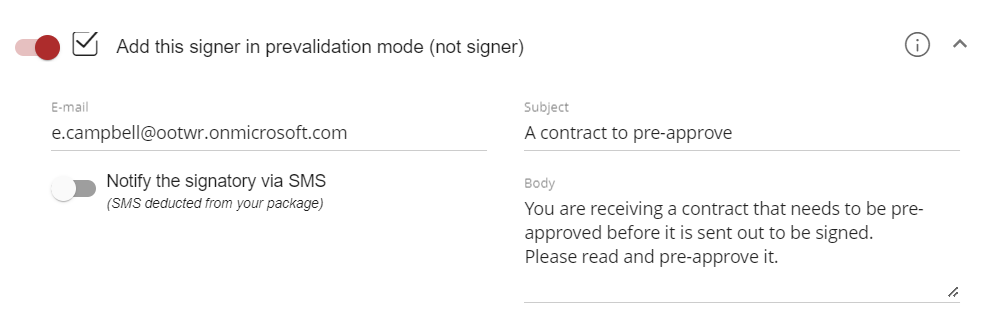
You can also choose to customize the email subject line and body.
-
When you have finished, click Apply.
-
Repeat the previous steps as many times as necessary to add other pre-approvers to your contract.
-
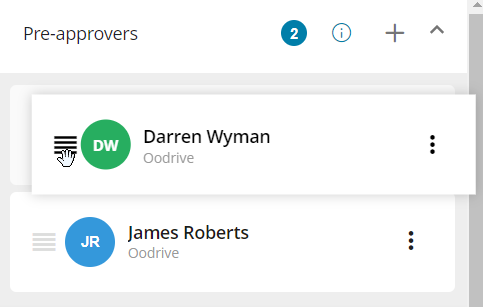
If you have chosen to add several pre-approvers, you can drag and drop the name blocks into the Pre-approvers section to define the order in which they will be involved:
Copy in recipients
Copied-in recipients receive a copy of the emails sent as part of the transaction for information purposes, but are not involved.
-
In the side panel, click the + sign to the right of the In copy section.
-
Select the person who needs copying into your transaction from the signatory directory, then click Next.
Note
If that person is not in the directory, you can click Create a new copy recipient to add them.
-
In the Select signatories window, enable the Copy setting. If you want to notify the recipient by SMS, enable the corresponding setting.
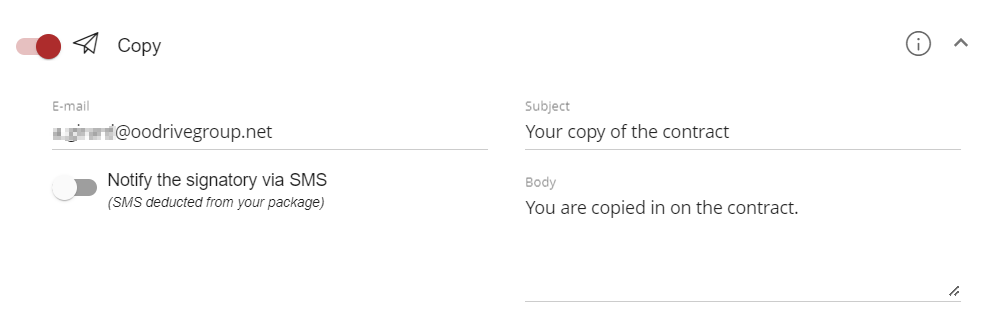
You can also choose to customize the email subject line and body.
-
When you have finished, click Apply.
-
Repeat the previous steps as many times as necessary to copy in other recipients.
Add signatories
Step 1: Add the signatories
-
In the side panel, click the + sign to the right of the Signatory section.
-
Select the signatory for your contract from the signatory directory, then click Next.
Note
If the signatory is not yet in the directory, you can click Create a new signatory to add them.
-
In the Select signatories window, select a signature mode.
You can choose from various signature modes:
Face-to-face signature
Face-to-face signature + SMS
Remote signature + email / SMS
Remote signature in SMS dialogue mode
Remote signature with identity verification
Qualified remote signature with dongle
-
When you have finished, click Apply. Your signatory is added to the transaction:
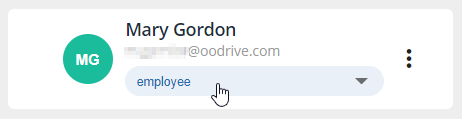
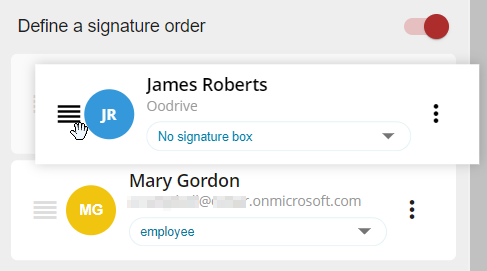
If your document for signature contains customized signature boxes, select the signatory role in the drop-down list below their name.
-
Repeat the previous steps as many times as necessary to add other signatories to your contract.
-
If your transaction includes several signatories, you can define the order in which they will sign. To do so, enable the Define a signature order option, then drag and drop the name blocks to arrange the signatories into the order of your choice.
-
If you have the Manager role (a user with the ability to approve transactions) and you wish to enable automatic counter-signature, enable the AUTO parameter opposite the Countersignature tag.
The contract will be automatically approved and counter-signed once the signature process is complete.
-
If you want reminder notifications to be sent automatically to your signatories, select a chase-up policy above the list of signatories.

-
Once your signatories have been added, perform one of the following actions:
If at least one signatory is remote, click Send twice to confirm that you want to send the email for signature.
If the signature is face to face only, click Sign, then go on to the signature step. If you have set several signatories, get them to sign one by one by selecting their names from the side panel.
When you have finished, a message confirms that your document has been sent/signed. Click Check my contract to monitor the progress of your transaction.
Step 2: Place additional Smartfields
If your Administrator has enabled this option, once signatories are added to the bundle you will have the ability to add additional standard Smartfields to your contracts, including signature pads and initials or signatory information.
-
After adding the signatories, click Edit Document.
Please note
This button is only available after you've added at leat one signatory to your contract.
-
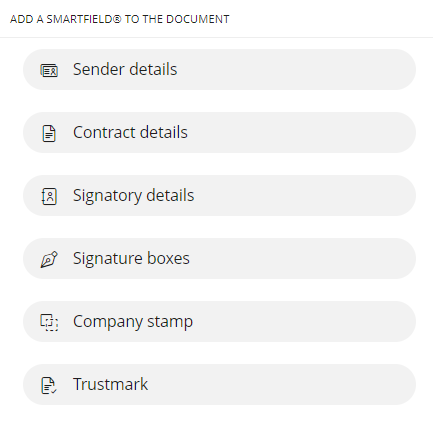
The contract opens in edit mode and the side panel displays a selection of standard Smartfields that you can place on your contract:
-
Click on a section to display the available Smartfields and place them in the contract:
-
Sender details
Select the information you want to display and click Add.
-
Given name
-
Job title
-
Town/City
-
Surname
-
Address
-
Country
-
Company
-
ZIP code
-
Smartfield(s) specific to your license, if any
-
-
Contract details
Select the information you want to display and click Add.
-
Signed on (date)
-
Signed in (location)
-
-
Signatory details
Select a signatory first, then select the information to display and click Add.
-
Title
-
Surname
-
Address
-
Town/City
-
Place of birth
-
Cell
-
Full name
-
Company
-
Address (cont.)
-
Country
-
Job title
-
Tel.
-
Given name
-
SIRET
-
ZIP code
-
Date of birth
-
Email
-
Smartfield(s) specific to your license, if any
-
-
Signature box
Select a signatory first, then choose the field type (signature pad or initials) and click Add.
-
Company stamp
The field dedicated to the company stamp is immediately displayed on the contract.
-
Trustmark
The field dedicated to the trust seal is displayed immediately on the contract.
-
-
The selected Smartfield is added to your contract and appears in the form of a blue rectangle.

Drag and drop the Smartfield to move it to the location of your choice on the document. You can also change the size and shape of the Smartfield by stretching its outline.
-
Repeat the previous steps as many times as necessary to add other Smartfields.
-
When you have finished, click Save.
Your Smartfields are now displayed on the contract. As these are standard Smartfields, they will be filled in automatically.
Step 3: Automate contract management and send it for signature
Before sending the contract for signature, you can choose to automate the countersignature process as well as the sending of reminders to signatories.
-
If you have the Manager role (a user with the ability to approve transactions) and you wish to enable automatic counter-signature, enable the AUTO parameter opposite the Countersignature tag.
The contract will be automatically approved and counter-signed once the signature process is complete.
-
If you want reminder notifications to be sent automatically to your signatories, select a chase-up policy above the list of signatories.
-
When you have finished, perform one of the following actions:
If at least one signatory is remote, click Send twice to confirm that you want to send the email for signature.
If the signature is face to face only, click Sign, then go on to the signature step. If you have set several signatories, get them to sign one by one by selecting their names from the side panel.
Ressources