 Help Center
 Go to Oodrive
Plan a new meeting
As the meeting organizer, you are responsible for preparing the necessary elements for the smooth running of the meeting.
To schedule a new meeting in Oodrive Meet, you will have to:
-
Create the meeting (name of the meeting, date, time, location, description...)
-
Generate a video conferencing link if the meeting is remote
-
Define the agenda
-
Plan possible voting sessions
-
Select participants
-
Upload meeting documents
Create a meeting
There are two ways you can create a new meeting: by using the Create meeting button or by duplicating an existing meeting. Once created, you can also choose to make your meeting recurring.
Create a new meeting
-
In the navigation panel, click Create, then Create meeting to access the new meeting menu.
-
Fill in the main fields: name, date, start and end time, and location of the meeting.
-
Click Advanced create mode to add a description or a video conferencing link.
-
Click Create meeting to save your planned meeting.
The meeting status is set to "in preparation" and will remain invisible to participants until you publish it
You can make changes to the meeting details at any time. To do so, go to the Meetings section and click on the meeting you want to modify.
Create a meeting based on an existing meeting
Duplicating a meeting allows you to retrieve information from a meeting to create a new one on the same template. Meeting duplication is especially useful for managing the recurrence of the meetings you organize.
Please note
The new meeting will only keep the general information (title, location and description), participants and the original meeting agenda. You won't be able to keep the following items:
related documents and agenda files
the Microsoft Teams video conferencing link
votes
-
In the Meetings section, select the meeting you want to duplicate.
-
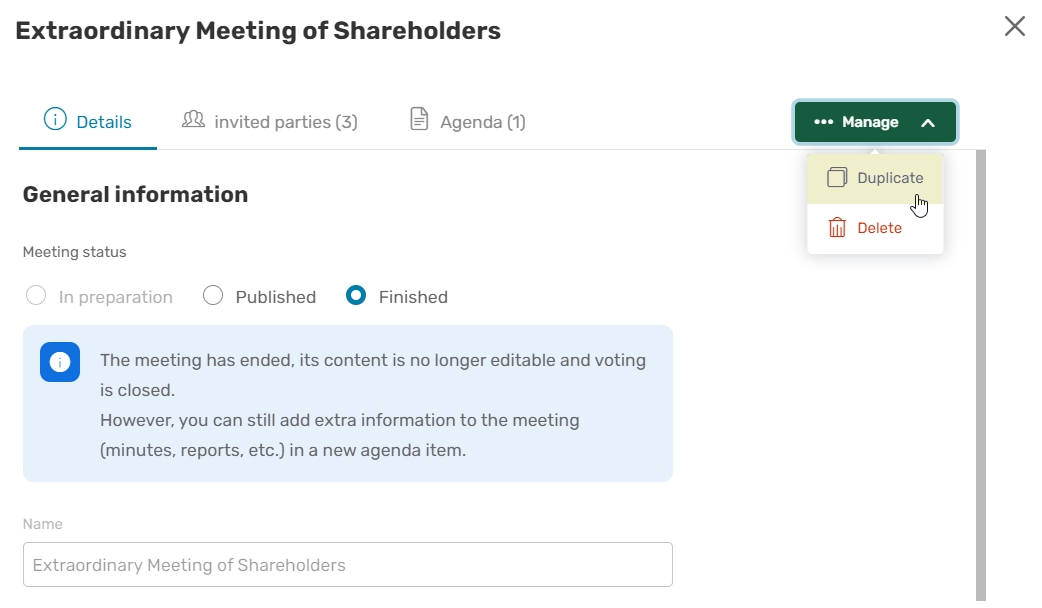
In the meeting's detailed view, click on the Manage button in the upper-right corner of the window and select Duplicate.
Please note
You also can do this action from the Meetings section by clicking on the three dots to the right of the meeting then selecting Duplicate.
-
The first time you duplicate a meeting, a message is displayed on the screen telling you which items will not be kept during the duplication.
If you no longer want to see this message, check I understand, don't show this message again and then click Duplicate.
-
The duplicated meeting is displayed on the screen. Make the necessary changes to prepare your new meeting.
-
Once you have finished, click Create duplicated meeting.
Create a recurring meeting
You can make a meeting you've organized into a recurring one. To do so, you must start by preparing the first meeting of the series before setting up a recurrence.
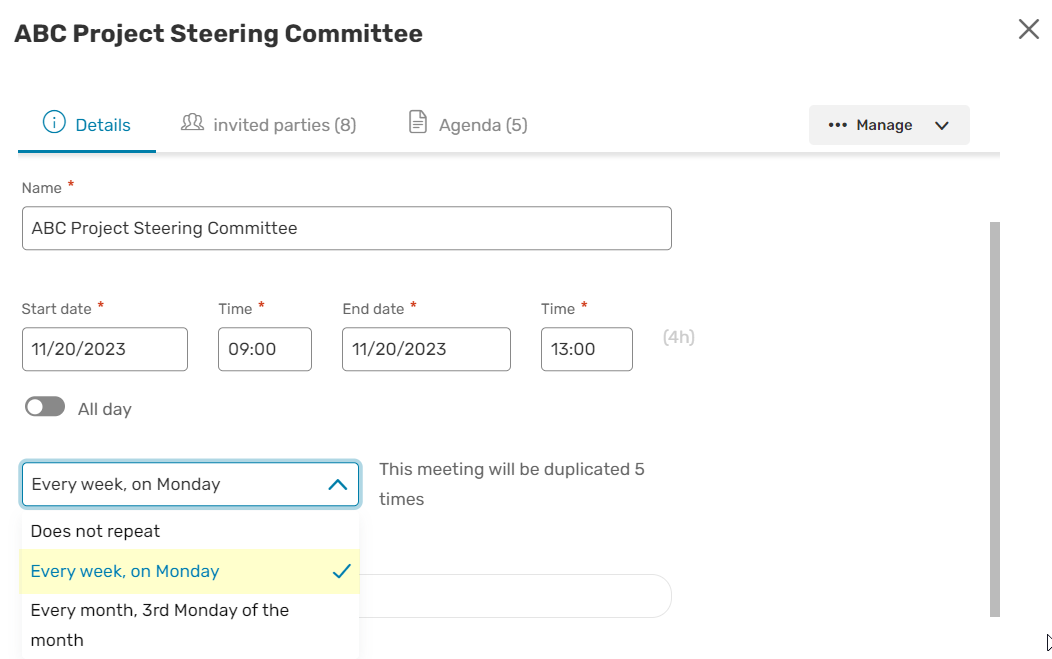
Depending on your preferences, your meeting can be held weekly or monthly. When you enable the recurrence, your meeting is automatically duplicated into 5 copies In preparation, one week or one month apart from each other.
These subsequent instances of your meeting will only keep the general information (title, location and description), participants, and agenda of the original meeting. The following items are not kept:
-
Related documents, agenda files and meeting minutes
-
The Microsoft Teams video conferencing link
-
Votes
Please note that each instance is considered to be a meeting of its own, independent from the other instances in the recurrence. This means that you can modify or delete any one of the instances without affecting the others.
-
In the Meetings section, select the meeting that needs to be repeated periodically.
-
In the meeting's detailed view, click on the Does not repeat drop-down menu and select the frequency of the recurrence:
-
Every week
-
Every month
The displayed options are adapted to the day selected for your original meeting.
Important
Once your recurrence is created, you will not be able to modify or delete it.
-
-
When you have finished, click Save.
The meeting is duplicated into 5 copies. In the detailed view of each copy, you will find the label Weekly recurrence or Monthly recurrence depending on the frequency you have chosen.

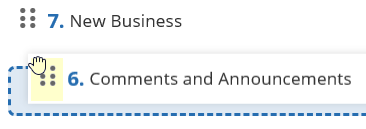
When your agenda is set to List view, the
 icon allows you to identify an instance of a recurring meeting.
Add a Microsoft Teams link
If your administrator has enabled this feature, you can add a Microsoft Teams video conferencing link to your meeting so that invited parties may participate remotely.
To add a Microsoft Teams video conferencing link to a meeting:
-
In the new meeting creation menu, or in the Details tab of an existing meeting, enable the Teams option.

-
Log in to your Microsoft account.
-
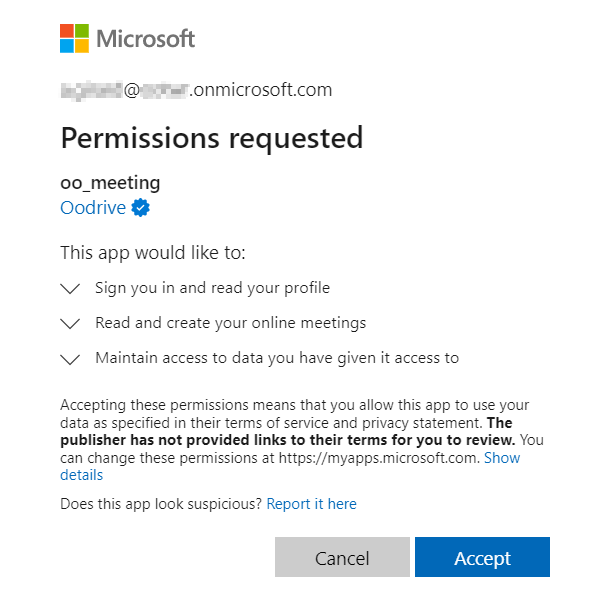
If this is your first time using the Teams feature, you must allow Oodrive Meet to access your Microsoft account.
To do so, view the requested permissions, then click Accept.
-
Finish creating or modifying your meeting, then save it.
You can disable your video conferencing link at any moment by selecting None.
.
The meeting link is generated.
Add a Tixeo link
If your administrator has enabled this feature, you can add a Tixeo video conferencing link to your meeting so that invited parties may participate remotely.
To add a Tixeo video conferencing link to a meeting:
If you do not already have the Tixeo desktop application, you will need to install it to launch the meeting.
-
In the new meeting creation menu, or in the Details tab of an existing meeting, enable the Tixeo option.

The Join Tixeo meeting button is displayed in gray.
-
Finish creating or modifying your meeting, then save it.
The meeting link is generated.
The next time you open this meeting, the Tixeo button will be active and in orange.
Please note
You cannot add a Tixeo link to a meeting that has already started.
You can disable your video conferencing link at any moment by selecting None.
Define the agenda
You can associate a duration, a description, a file or a vote to each agenda item to make it easier to keep track of your meeting.
-
In the Meetings section, select the meeting for which you want to define the agenda.
-
From the meeting's detailed view, click the Agenda tab.
-
Click Create item, then fill in the item's title and, if you want to, its duration.
-
To add to an item, click on the three dots to the right of its name and select an element to add: Description, Files or Vote.
-
Add as many items as necessary by clicking Create item again.
You can also add sub-items by clicking Create sub-item under the parent item of your choice.

If you want to remove an item or sub-item from the agenda, click the three dots to its right and select Delete.
-
Once created, you can reorganize your items into the order of your choice. To do this, click on the six dots to the left of an item to move via drag-and-drop.
-
When you have finished, click Save to save the agenda.
Return to the Agenda tab at any time to make changes to the agenda.
Create a vote
You can create a vote to get feedback from meeting participants on an agenda item or to gather any other information. It is also possible to associate a vote with each item on the agenda.
If you are also a participant in the meeting you are organizing, you will also have the opportunity to vote.
-
In the Meetings section, select the meeting for which you want to organize a vote.
-
In the Votes section, click Add vote.
Tip
To attach a vote to a specific item in the Agenda tab, click on the three dots to the right of the item and select Vote.
-
Enter the question that will be voted on by the meeting participants.
-
Select a voting method: Anonymous or Show of hands.
-
In the Choices / options section, select Single choice or Multiple choice, depending on whether you want to allow participants to select several responses.
-
Specify the possible answers. You can add as many responses as necessary by clicking Add choice.
-
When you have finished, click Save.
As long as you do not open the voting session, you can return at any time to the meeting details to delete a vote or make changes.
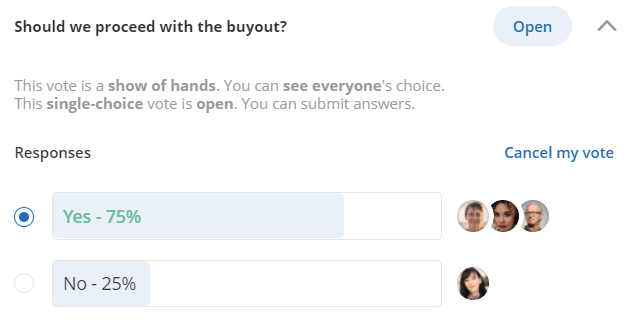
Open the voting session once the meeting is published
-
In the meeting's detailed view, select your question and click Open voting, then Save.
Tip
When the voting session is open, you can click on a question at any time to view its progression in real-time.
-
Close the voting session by clicking your question, then Close voting.
Add participants
From the quick or advanced meeting creation form, you can add contacts, users and groups as participants using your workspace address book.
-
In the Meetings section, select the meeting for which you want to define the participants.
-
In the meeting's detailed view, click the Invited party tab.
-
If you plan to attend the meeting you are organizing, click yes in the banner along the top of the window.
-
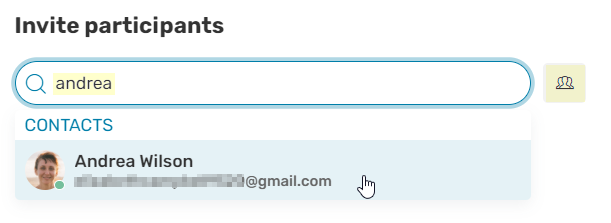
In the Invite participants section, enter the name of a participant or a group to add them to the meeting.
Tip
Click
 to select participants directly from your address book.
 -
If you need to remove a participant, click on the three dots to the right of the participant's name, and select Delete.
Return to the Invited parties tab at any moment to modify the list of participants or view their attendance status.
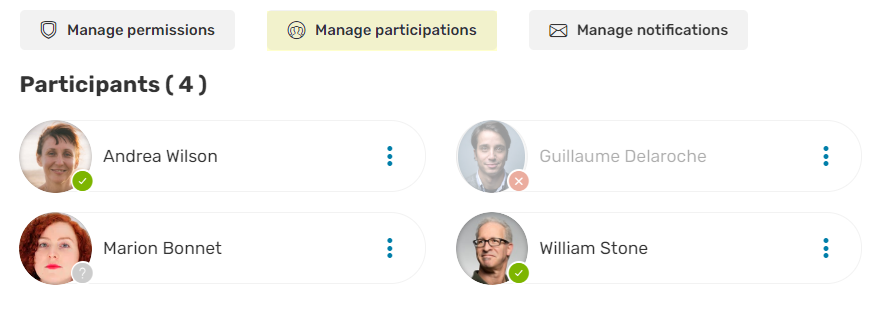
You also have the possibility to define the attendance status of guests by clicking Manage participations.
Add meeting documents
You can make meeting documents available to your invited parties. Documents can be added as related documents or attached to a specific agenda item.
With the granular management of permissions provided by Oodrive Meet, you can define exactly which documents each invited party has access to and the scope of their actions on each document.
Step 1: Attach documents to a meeting
From your computer
-
In the Meetings section, select the meeting to which you want to attach files.
-
In the Related documents section near the bottom of the page, click Add files.
Tip
To attach documents to a specific item in the Agenda tab, click on the three dots to the right of the subject and select Files.
-
Click Import in the upper-right corner of the window.

-
Browse the file explorer on your computer and select one or more files by holding down the Ctrl key.
-
Click Open.
The files are uploaded to your workspace and will be available next time you want to attach documents to a meeting.
-
Click Add to meeting.
If you want to remove a document from the related documents or the agenda, click on the three dots to its right and select Remove.
From a teamspace
If Oodrive Work is available on your workspace, you can import documents from either a teamspace or your personal space (My Space) and attach them to your meeting.
Warning
If the owner of the teamspace decides to restrict your permissions, you may no longer be allowed to share certain documents. These documents will be automatically removed from your meeting.
-
In the Meetings section, select the meeting to which you want to attach files.
-
In the Related documents section near the bottom of the page, click Add files.
-
The list of your spaces is displayed. Select the space that contains the files you want to add to the meeting.
Tip
To attach documents to a specific item in the Agenda tab, click on the three dots to the right of the subject and select Files.
-
Select documents to upload, then click Add to meeting.
Step 2 : Define participant permissions
-
In the meeting's detailed view, click the Invited party tab.
-
In the Invite participants section, click Manage permissions.
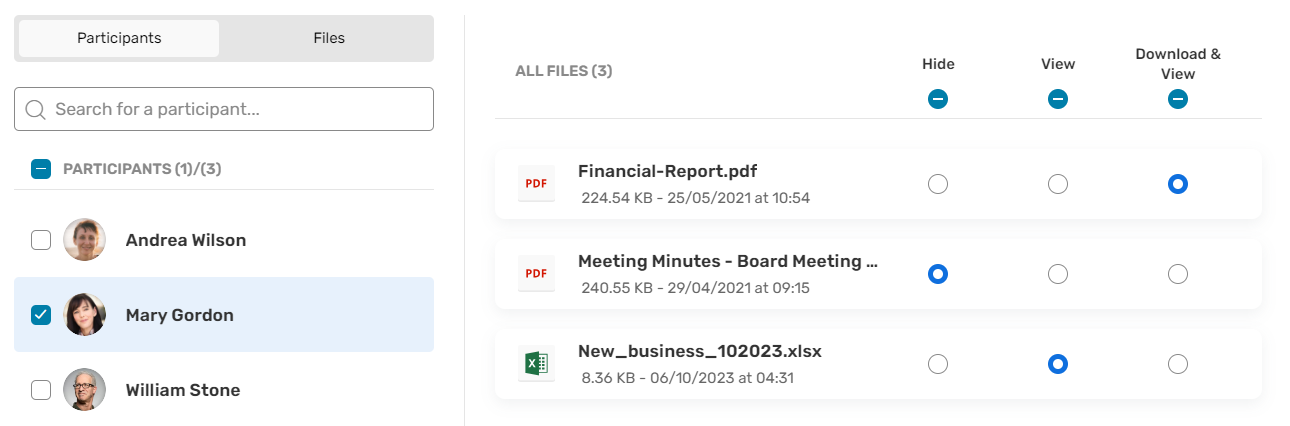
You will now be able to define the access level of each participant for all meeting documents.
Tip
To define the permissions associated with a specific document in the Details or Agenda tab, click on the three dots to the right of that document and select Manage permissions.
-
By default, all participants are selected. Adjust the selection as needed in order to set permissions for a specific group or a single participant
-
Select the access level you want to grant the participant(s) for each document.
-
When you have finished, click Finish, then Save.
Generate a Boardbook
You can generate a Boardbook from the detailed view of your meeting. This feature allows you to merge multiple PDF files into a single document, preserving their original order and providing a clear, hierarchical structure.
The Boardbook includes:
-
the meeting agenda,
-
a summary of the documents related to the agenda, with the PDF files sorted in the planned order,
-
a summary of the attached files, added at the end and also sorted in order of appearance,
Files related to the agenda are merged first, followed by any attached files.
Create a Boardbook
Requirements
To generate a Boardbook, the following conditions must be met:
-
Only PDF files can be grouped together.
-
Each file must be less than 50 MB in size.
-
The files must be available to all participants.
-
In the Meetings section, select the meeting for which you want to generate a Boardbook..
-
Under Boardbook, click Generate the Boardbook.
-
In the window that appears, browse your folders and go to the location where you want to save your Boardbook.
-
When you have finished, click Generate the Boardbook.
The Boardbook will then appear in the dedicated section, automatically using the name of the meeting as its title. An orange dot indicates that the Boardbook is currently being generated.

-
Once the Boardbook has been generated, the orange dot disappears and it is attached to your meeting. It will be available to meeting participants as soon as the meeting is published.
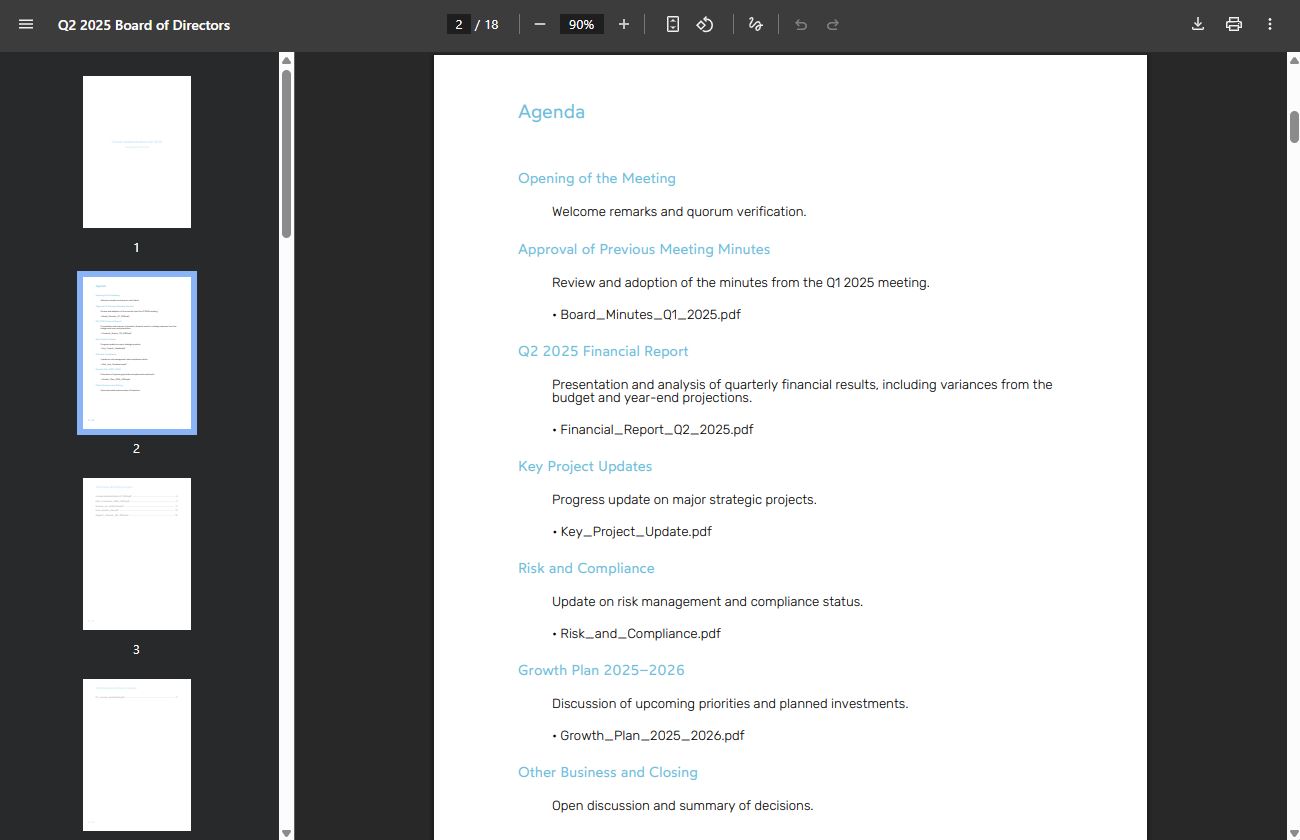
Below is an example of a Boardbook:
Download the generated Boardbook
Once generated, the Boardbook is available from the detailed view of your meeting: you can view or download it, while participants can only view it.
-
From your meeting list, select the meeting containing the Boardbook you need.
-
Under Boardbook, click the three dots next to the Boardbook, and select View or Download.

Remove the generated Boardbook
You can remove the Boardbook generated from your meeting, particularly if you want to replace it with an updated version, fix an error, or temporarily restrict access to it. This action allows you to maintain control over the documents shared with participants and ensure that the information distributed is relevant.
-
From your meeting list, select the meeting containing the Boardbook you want to remove.
-
Under Boardbook, click the three dots next to the Boardbook, and select Remove .
-
Confirm removal of the Boardbook by clicking Remove.
The Boardbook is removed from the meeting but remains available in your files.
Please note
If the generated Boardbook no longer appears in your files or in your meeting without you deliberately deleting it, you can regenerate it at any time by clicking on Regenerate the Boardbook.
Resources